Showing posts with label 3D Sculpting. Show all posts

Wednesday, 17 September 2014

I AM KROGAN!

So continuing once more with updating older stuff this is the latest piece of sculpting I was toying around with. Its a short post this time unfortunately.
After reading some articles in 3D Artist about 3D printers I got the idea to try to sculpt something I could print, a little character model would be perfect!
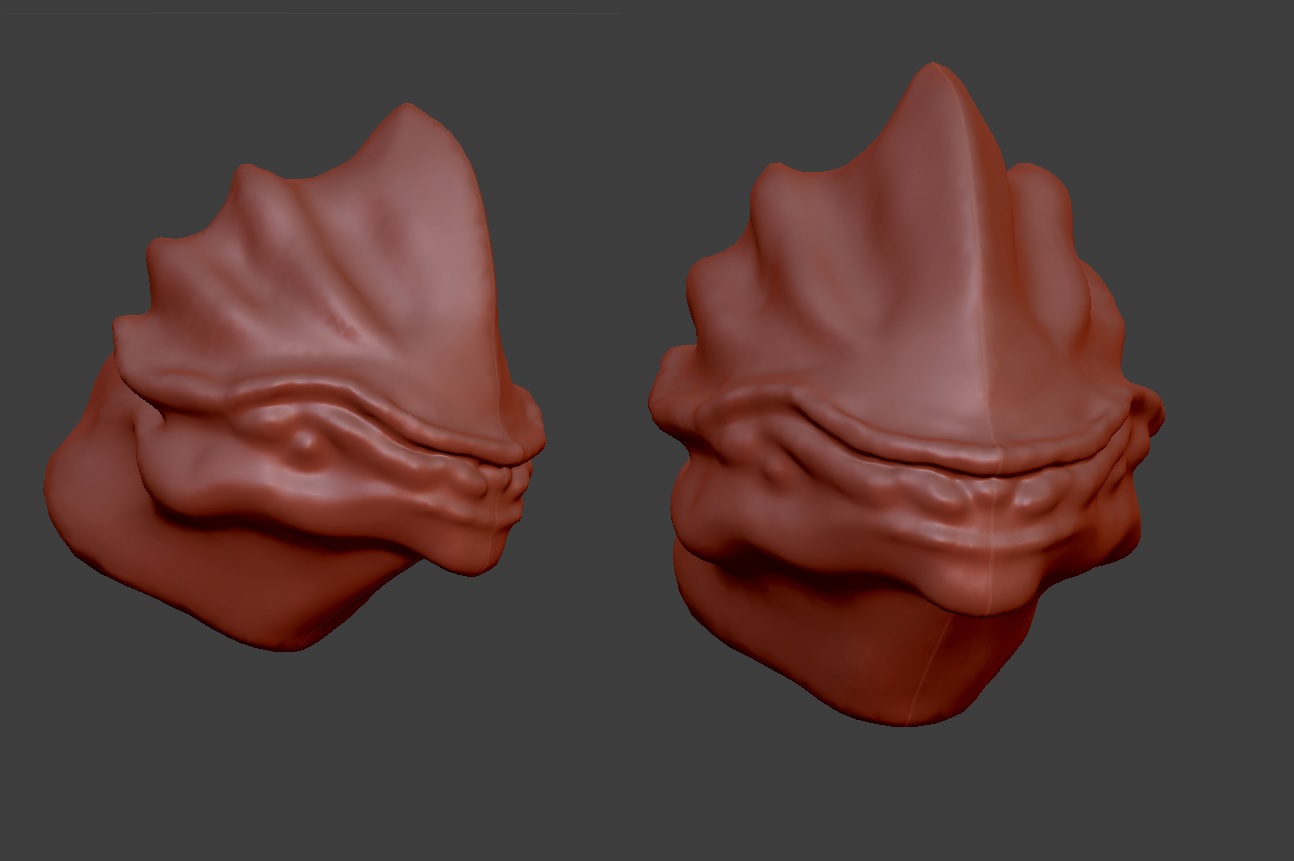
For my love of Mass Effect I thought a Krogan model would be interesting to make as they have lots of detail to them.
I started toying around with a basic sculpt for Wrex's head, as you can see the model itself has a basic shape to it but that is it so far.

So during my sculpt planning I discovered a problem. Sculpting is difficult and somewhat pointless to make a humanoid shape from scratch when there is an easier solution at hand. Ideally the best way to tackle this would be to make a generic male humanoid shape in Blender and then transfer it to Sculptris then work on the detail within this program instead of attempting to make it all from scratch.
So after an evenings work I put down the pen and decided to leave this until I had learned how to create models in Blender first.
This will be a technique used in future projects as I really want to work on something that can be 3D printed.

To summarize:   
  • Learn and create basic models in Blender to transfer into Sculptris
  • Import a humonoid model and sculpt ontop of it
  • Create a cool scaled model to 3D Print in the future

Tuesday, 16 September 2014

Sculptris....with more skulls

So moving on through updating my older projects on here.
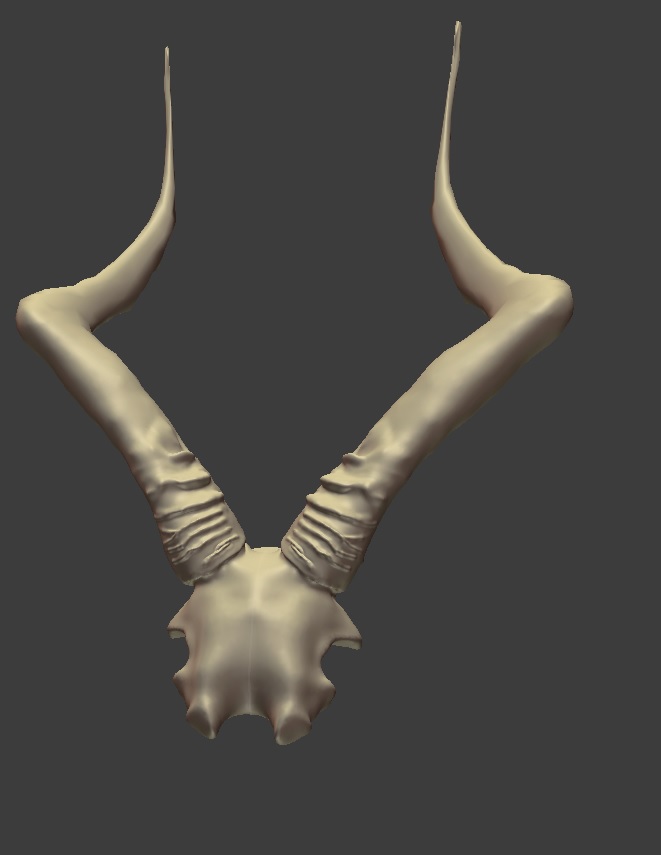
My a few months back other half went on a family/hunting trip back to his home in South Africa, he and his dad brought me back some horns from a Springbok and a Rooibok. Looking at the Rooibok skull I decided it would be a good idea to try sculpting it as I have a model in front of me to rotate and see all the aspects of.

To start with I started playing around with the interesting materials Sculptris provides and settled on this bone colouring instead of the red i had previously used. Unlike with eh wolf skull I could see more on this sculpt using the white rather than the red. I guess it pretty much comes down to what shape your sculpting is that gives the best highlights to help.

So one of the biggest problems I started with was getting the horns to extend without having the flat tearing issue I've experienced before, so it was a slow process extending the blob then inflating it so it would keep a shape, got their in the end with a rough shape, you can see right at the tip of the horns its starting to get that slight error to it which i need to fix. I manged to get the basic shape down pretty quickly this time.


The only thing to be aware of the skull I'm working from isn't uniform - half of the faceplate is cut off on the left side - but because of how the sculpting program works it works symmetrically along that central line so its not something I can fix until the very end of the sculpt as once you turn the symmetry off you wither cant turn it back on or it just can ruin stuff - I cant recall which happens off the top of my head right this minute.
Next step was to roughly mark out by inflating where the ridges on the horns started to go and then bulk them out later on.
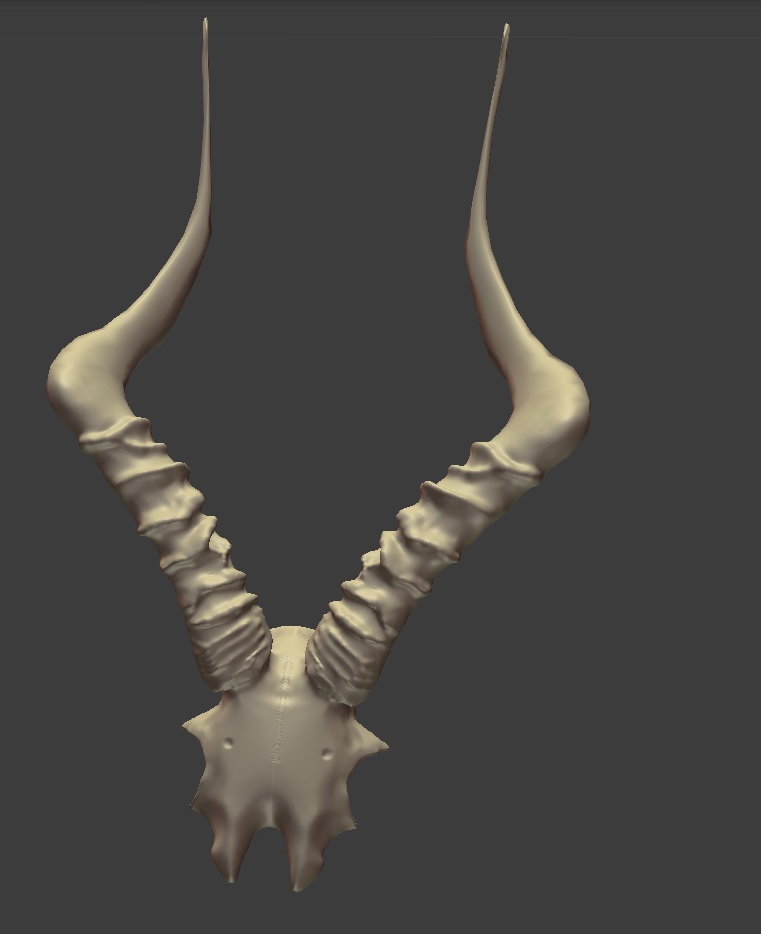
So after another few evenings it now looks something like this:
You can see much clearly with the horns about the systemtry feature.
So I fiddled around with the angles and fixed the overall shape of the skull itself, attempting to make it flatter as you can see I went a bit too far with the flattening tool but I'll fix that later on at some point. I continued along with the horn ridges and inverting the inflate tool to help create the slip where the skull and horns attach separately. Inverting the controls is an amazing feature to play around with it really helps creating the definition you need.
Thankfully the horn ridges tapper off just after curving round, I was dreading the idea of working on the thinnest section just in case I tore through the shape.
I think overall so far with this model I haven't encountered that many problems or issues just yet, I think the next challenge will be working on the underside of the skull - making it into a shell basically - as this has to be shaped in such a way I'm worried it might in inadvertently affect the stuff I've done to the top side but we'll see when I come back to it. I got weighed down with some other stuff so I put it to one side at the moment but like the wolf skull its something I'll be coming back to to finish off as I don't want to leave these unfinished.
Overall defiantly feeling comfortable with the program itself, I just need to sit down and learn to refine the models and details some more.

To summarize:   
  • Continue to play around in the Sculptris program
  • Create and work on a basic model with access to physical reference material
  • Learn techniques to take onto the next model - mostly inverting
  • Go back and learn tutorials / lessons to improved and develop on model for a future date
Monday, 15 September 2014

Introduction to Sculptris

So as I’ve mentioned somewhere before I’ll start by uploading a fair bit of my progress from ongoing projects – so it’ll be a lot of older stuff that people may have seen before on Facebook etc. The downside being is a lot of details / lessons or stuff I picked up while I was doing it might not be listed here as it was some time ago I started it, but for the newer projects it will have lot more detail put into it.


But where better to star than me learning a new piece of software. I should state that I only spend the few hours I can after work to learn and develop upon whatever I might be working on at the time.
So, on my quest to learn 3D modelling I ran into a few problems, as most adventurers do when starting off a new quest! However for me they were mostly cost based issues. I couldn’t afford the software used or art time courses in London to learn them from (I have now since managed to find a course in Richmond that is actually affordable but it will now have to wait till next year before I can look at signing up for the course) however not all hope was lost! As such to start with I’m going to use the free software for modelling – Sculptris and Blender.
As I’ve sculpted (with clay) before in my art course I decided to start with Sculptris to look at first (my plan now however is to learn blender so I can import models over to Sculptris to detail but that will be mentioned in future course after Iv updated all my older stuff first) so to start with I brought up youtube tutorials and watched them, but I tried to jump right in and attempt to make something.
I know all beginning tutorials are normally something simple like make a shape / cube / teapot or what not, but being how I am I learn a lot more diving right in so I decided to take the lessons I watched on Youtube / read on various sites and apply it to a model I’d be happy to work with. And considering this was just me seeing if it was something I’d like to do more of making a sphere or something isn’t going to exactly win me over so just to start with I decided to make something Id enjoy just to start with then go back and work on all the lessons properly.
 As I love wolves I started off with a wolf skull (so I wouldn’t have to worry about fur detailing but just get to grips with the program) I managed to find several reference pictures online from different angles that would help. The image below is after an evening or 2 after work just playing around and getting basic shape going.


I was quite pleased with what I had so far, I’d also been using a tablet to work with which for me felt a lot nicer to use. I learned quite quickly also to make running saves as I had a lot of issues with extending parts of the shape too flat would cause a lot of clipping issues that I just couldn’t fix. I also discovered that to remove sections is difficult – so to make the jaw bone shape bend round was not how I pictured it being, with clay you can just cut away at that part and remove the centre but with the program you wither have to extend the shape to go around or you start pushing the material to the side to create a hole. Overall it was rather challenging just to get the shape I was after but when I finally managed it I felt happy with what I had.
I was determined to play around with the other tools and start giving the model more shape / definition so as seen below if my progress after another evening or 2 after work.  A lot of my focus was on getting the lower jaw built and the teeth to line up and look the right shape.


As you can see it started to come together more, the main problem I now discovered was working on the back part of the skull where the skull and lower jaw bone join, reference pictures are amazingly helpful but none of them show the area underneath or clearly enough so I had no idea how to naturally model that part of the skull leaving me at a sort of standstill at that point.
For now I’ve left it at that point, but it is something I will come back to again to finish but I wanted to play around with another model as I had a skull at home to use as a reference point rather than pictures. But as this was just me learning the software I felt this was a good start.
I’ve got lots of issues of 3D Artist magazines given to me recently so at some point I need to flick through and look through the issues with reference to sculptris / Zbrush and look at the CD material
To summarize:   
  • Learn a new program  - Sculptris
  • Create and work on a basic model – Wolf Skull
  • Learn techniques to take onto the next model
  • Go back and learn tutorials / lessons to improved and develop on model for a future date