Another evening on finishing the main bulk of the claywork. So I managed to bulk out the face more and adding the many fold lines that are across the face around the cheeks and forehead.
Here you can see the progress so far:
There not too much to say I managed to achieve what I wanted to do tonight which was getting the rest of the structure down - I need to watch some footage though before tomorrow as I'm still not happy that the nose is correct - I think I will need to push it in more so its more scrunched up to the face. (Unfortunately most picture on Google is Jim Carrey pulling his normal funny faces so its hard to tell, but gives me a reason to watch a Christmas movie a little early.)
I'm also considering pushing the eyebrows up a bit further but as they're hidden by the fur it shouldn't make too much difference.
Finally I need to work on the edges and lip ears to get it smoothed out and thinned out.
So the next big push will be finalising the structure then on to start the smoothing & detailing. Hopefully if I can nail this down tomorrow I can spend the weekend making the cast with more care this time round so there hopefully wont be air pockets.
Thursday, 20 November 2014
Wednesday, 19 November 2014
Christmas Project Pt1
So starting a few new projects today for the Christmas party. This is a 2 part project at the moment.
Part 1: A Grinch mask / Prosthetic
Part 2: A Krampus mask + outfit
So to start with I'm getting what I'm weighing up to be the easiest / quickest of the two: the Grinch mask. The process to start with is the same as the zombie prosthetic, for the first few evenings after work I'll start the blocking process on the face using clay, following on from that will be detail + texture then finally molding and casting.
The main idea is to get Grinch finished but the end of the week. Which should then give me the next week to work on the Krampus mask and a further week to get all the kit together for it.
So to start with I outlined on the mannequin head the lines biased on the Jim Carrey Grinch. You can enjoy this classy reference picture for the moment.
I started to block out the shapes and folds with the clay just to get the basic shape, tomorrow night I'll start to bulk out the details and add depth to it before the detailing can begin.
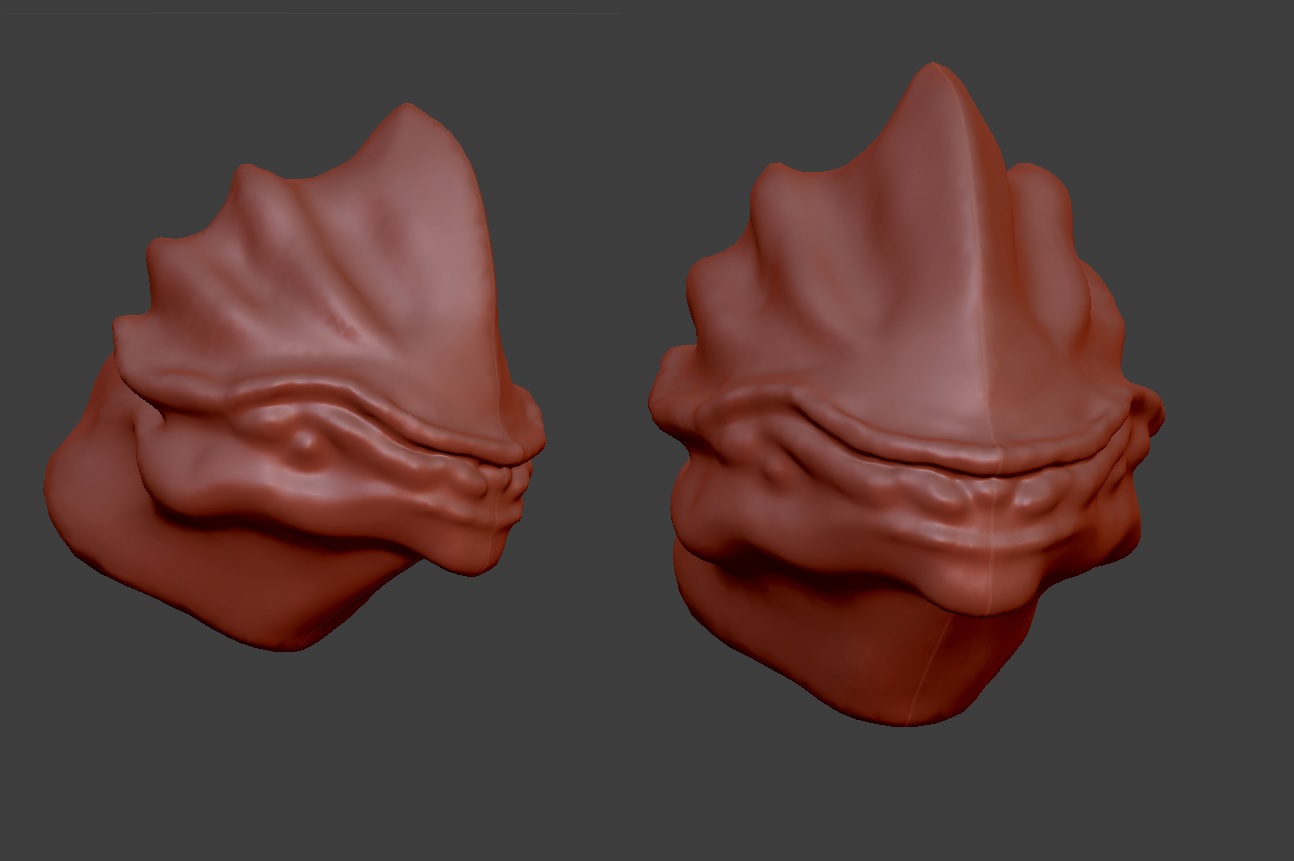
So here is the progress for now:
So as you can see its just the basic shape for the moment the nose / muzzle area needs to come out more at the sides and I need to start bulking out the cheeks and eyebrows also. I might have to get better pictures or re-watch the film again to see if I've made the nose too far out as I think its more squashed in that what I've made it but its a start.
Thursday, 6 November 2014
Learning prosthetics Pt 2
So to continue where I left off, I finished up as much of the clay work that I could in the limited time I had. Moving on to the next steps: molding and casting.
I coated the clay face in a silicon release agent and let it dry while I mixed up a patch of plaster.
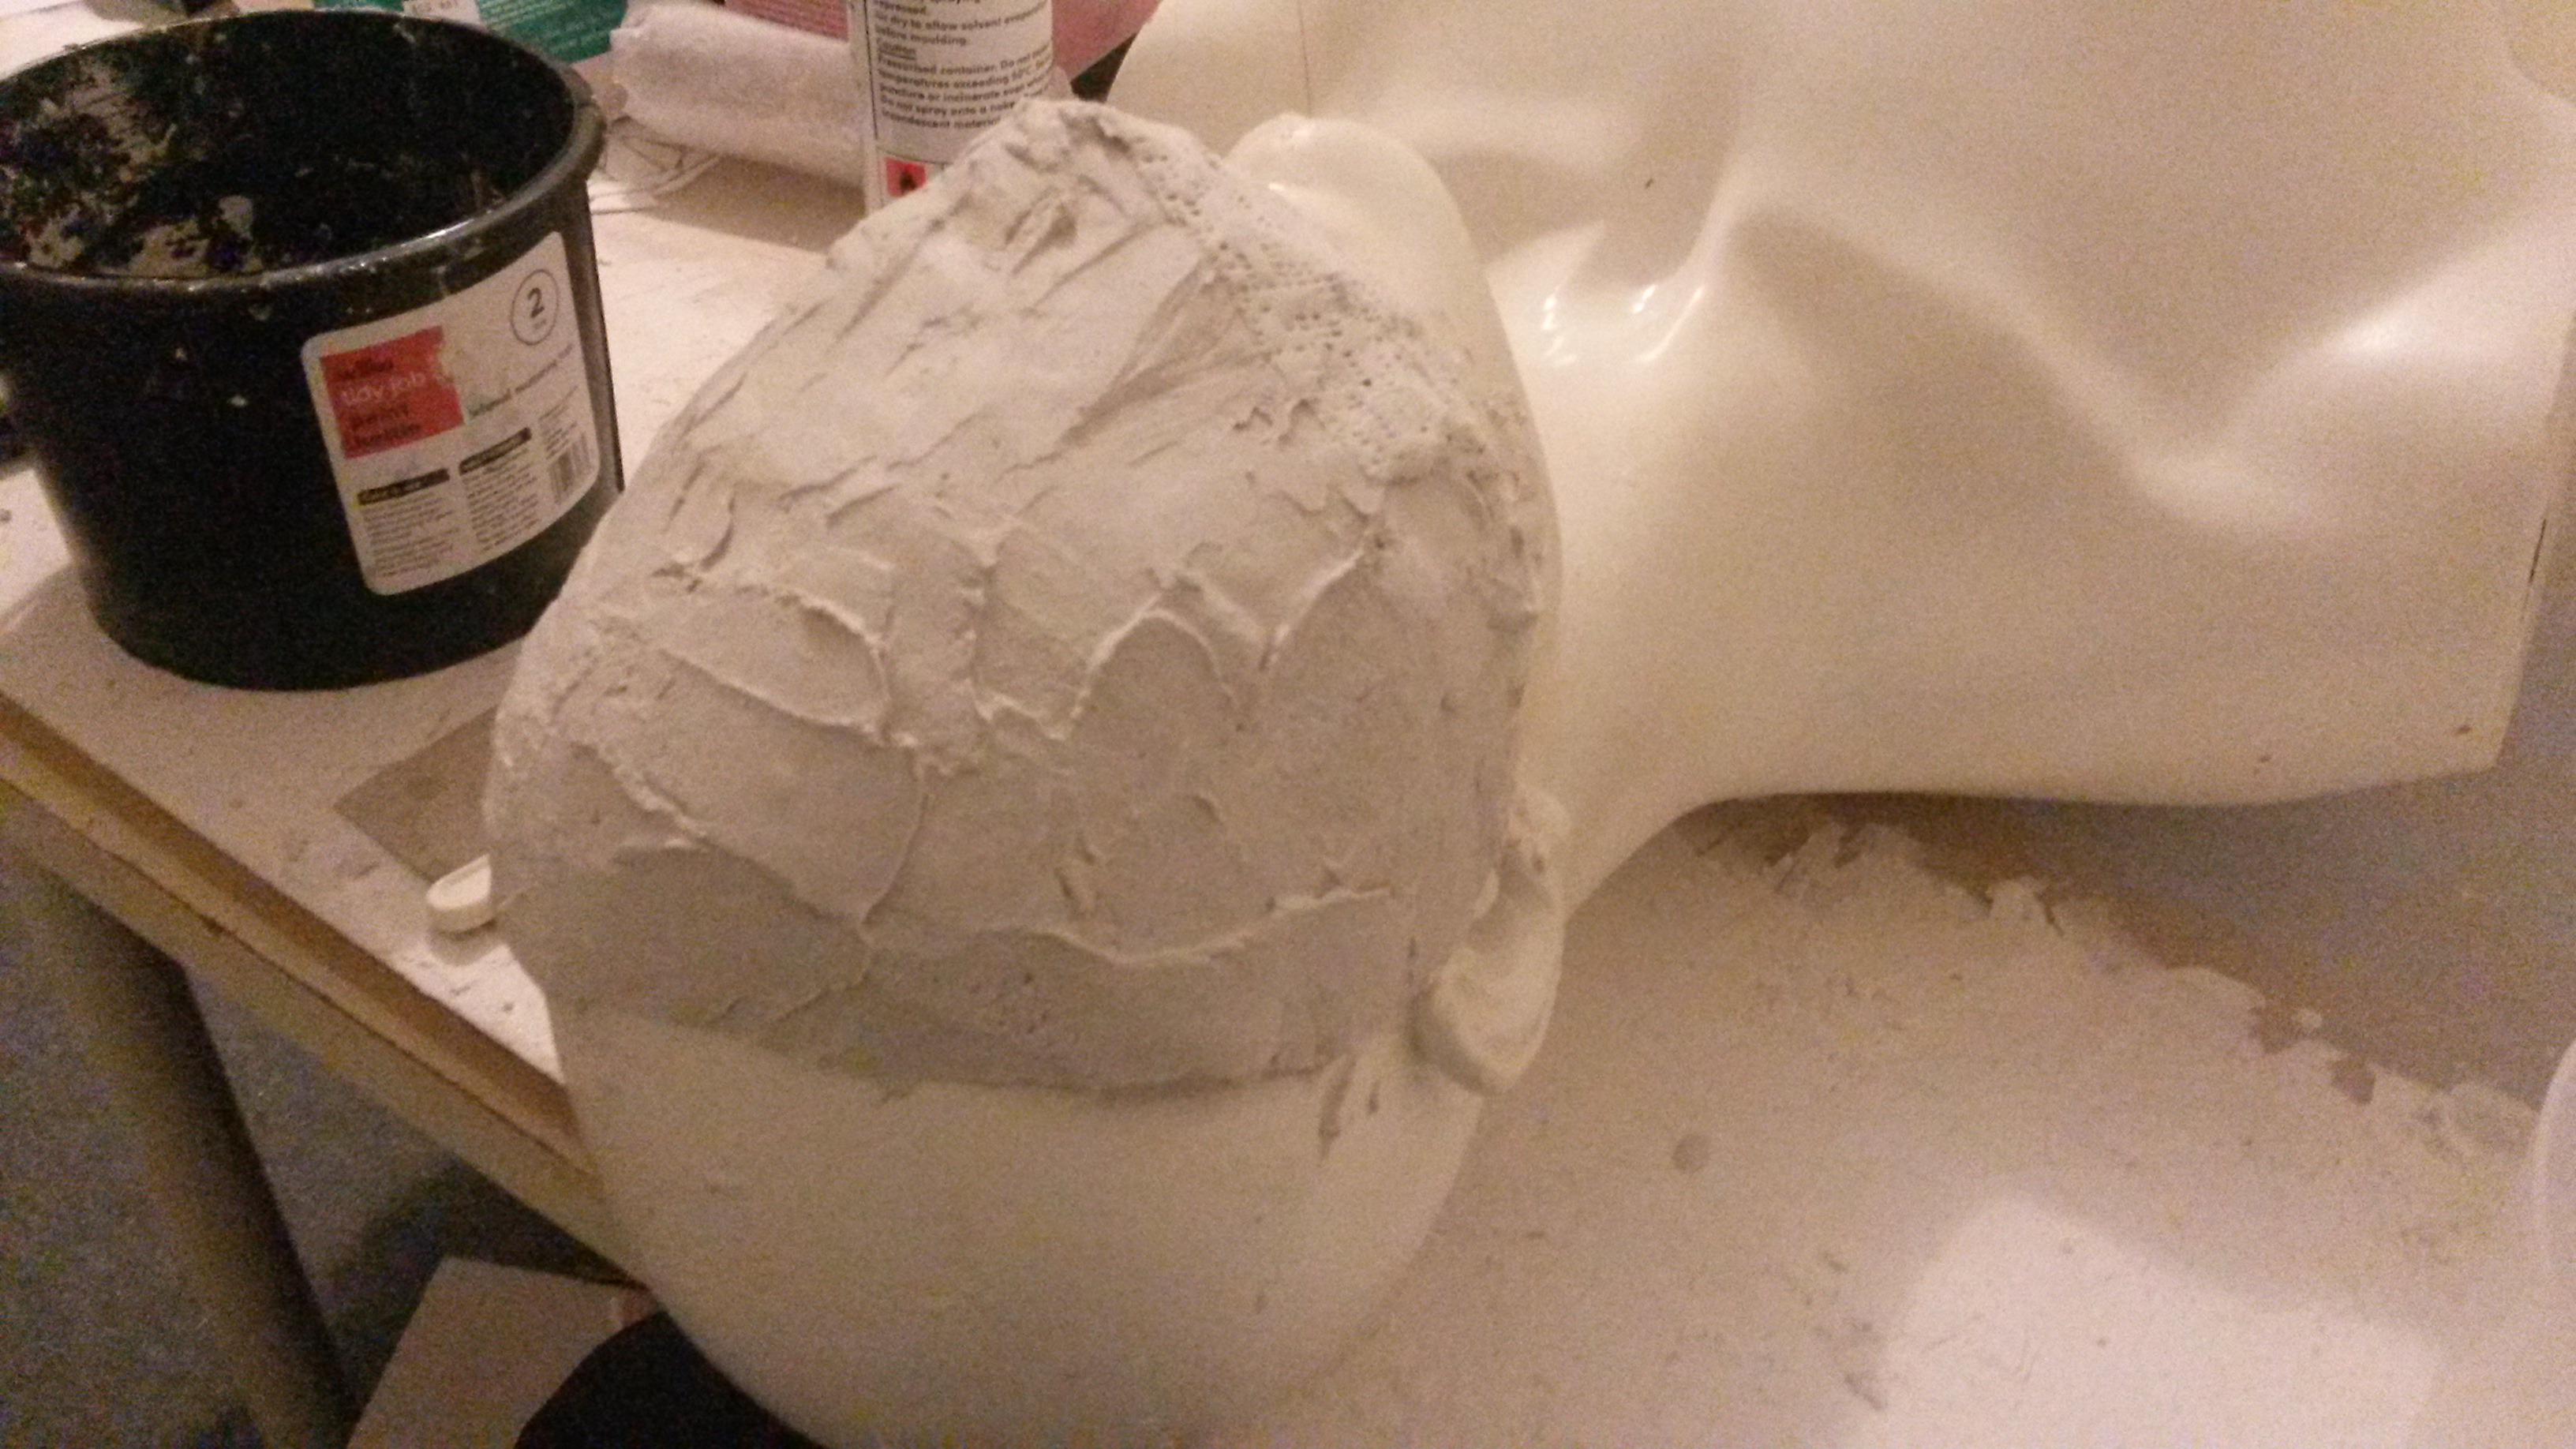
I managed to coat the entire front part of the face without too much issue - having a proper head cast would of been nicer as its a less bulky piece to work with the large mannequin kept rocking a lot and was just really awkward to get the plaster to sit without slipping down the sides everywhere.
So as you can see here is the plaster cast in process - learned afterwards that either i didn't apply my plaster correctly or mix it very thoroughly as there was a lot of random pockets in the cast where the mold had not worked correctly.
Once set I pulled it off - there was some issues around the edges where either the release agent wasn't present or where the plaster was thin but after some back and forth wriggling it came off. I cleaned the clay off as best as I could and went straight into my first cast.
So never having done this before I had way too much fun microwaving the gelatin mix and playing around with it - its such a fascinating material to work with. As you can see below I managed to pour the gelatin in and slush it around the mold to fill in all the gaps.
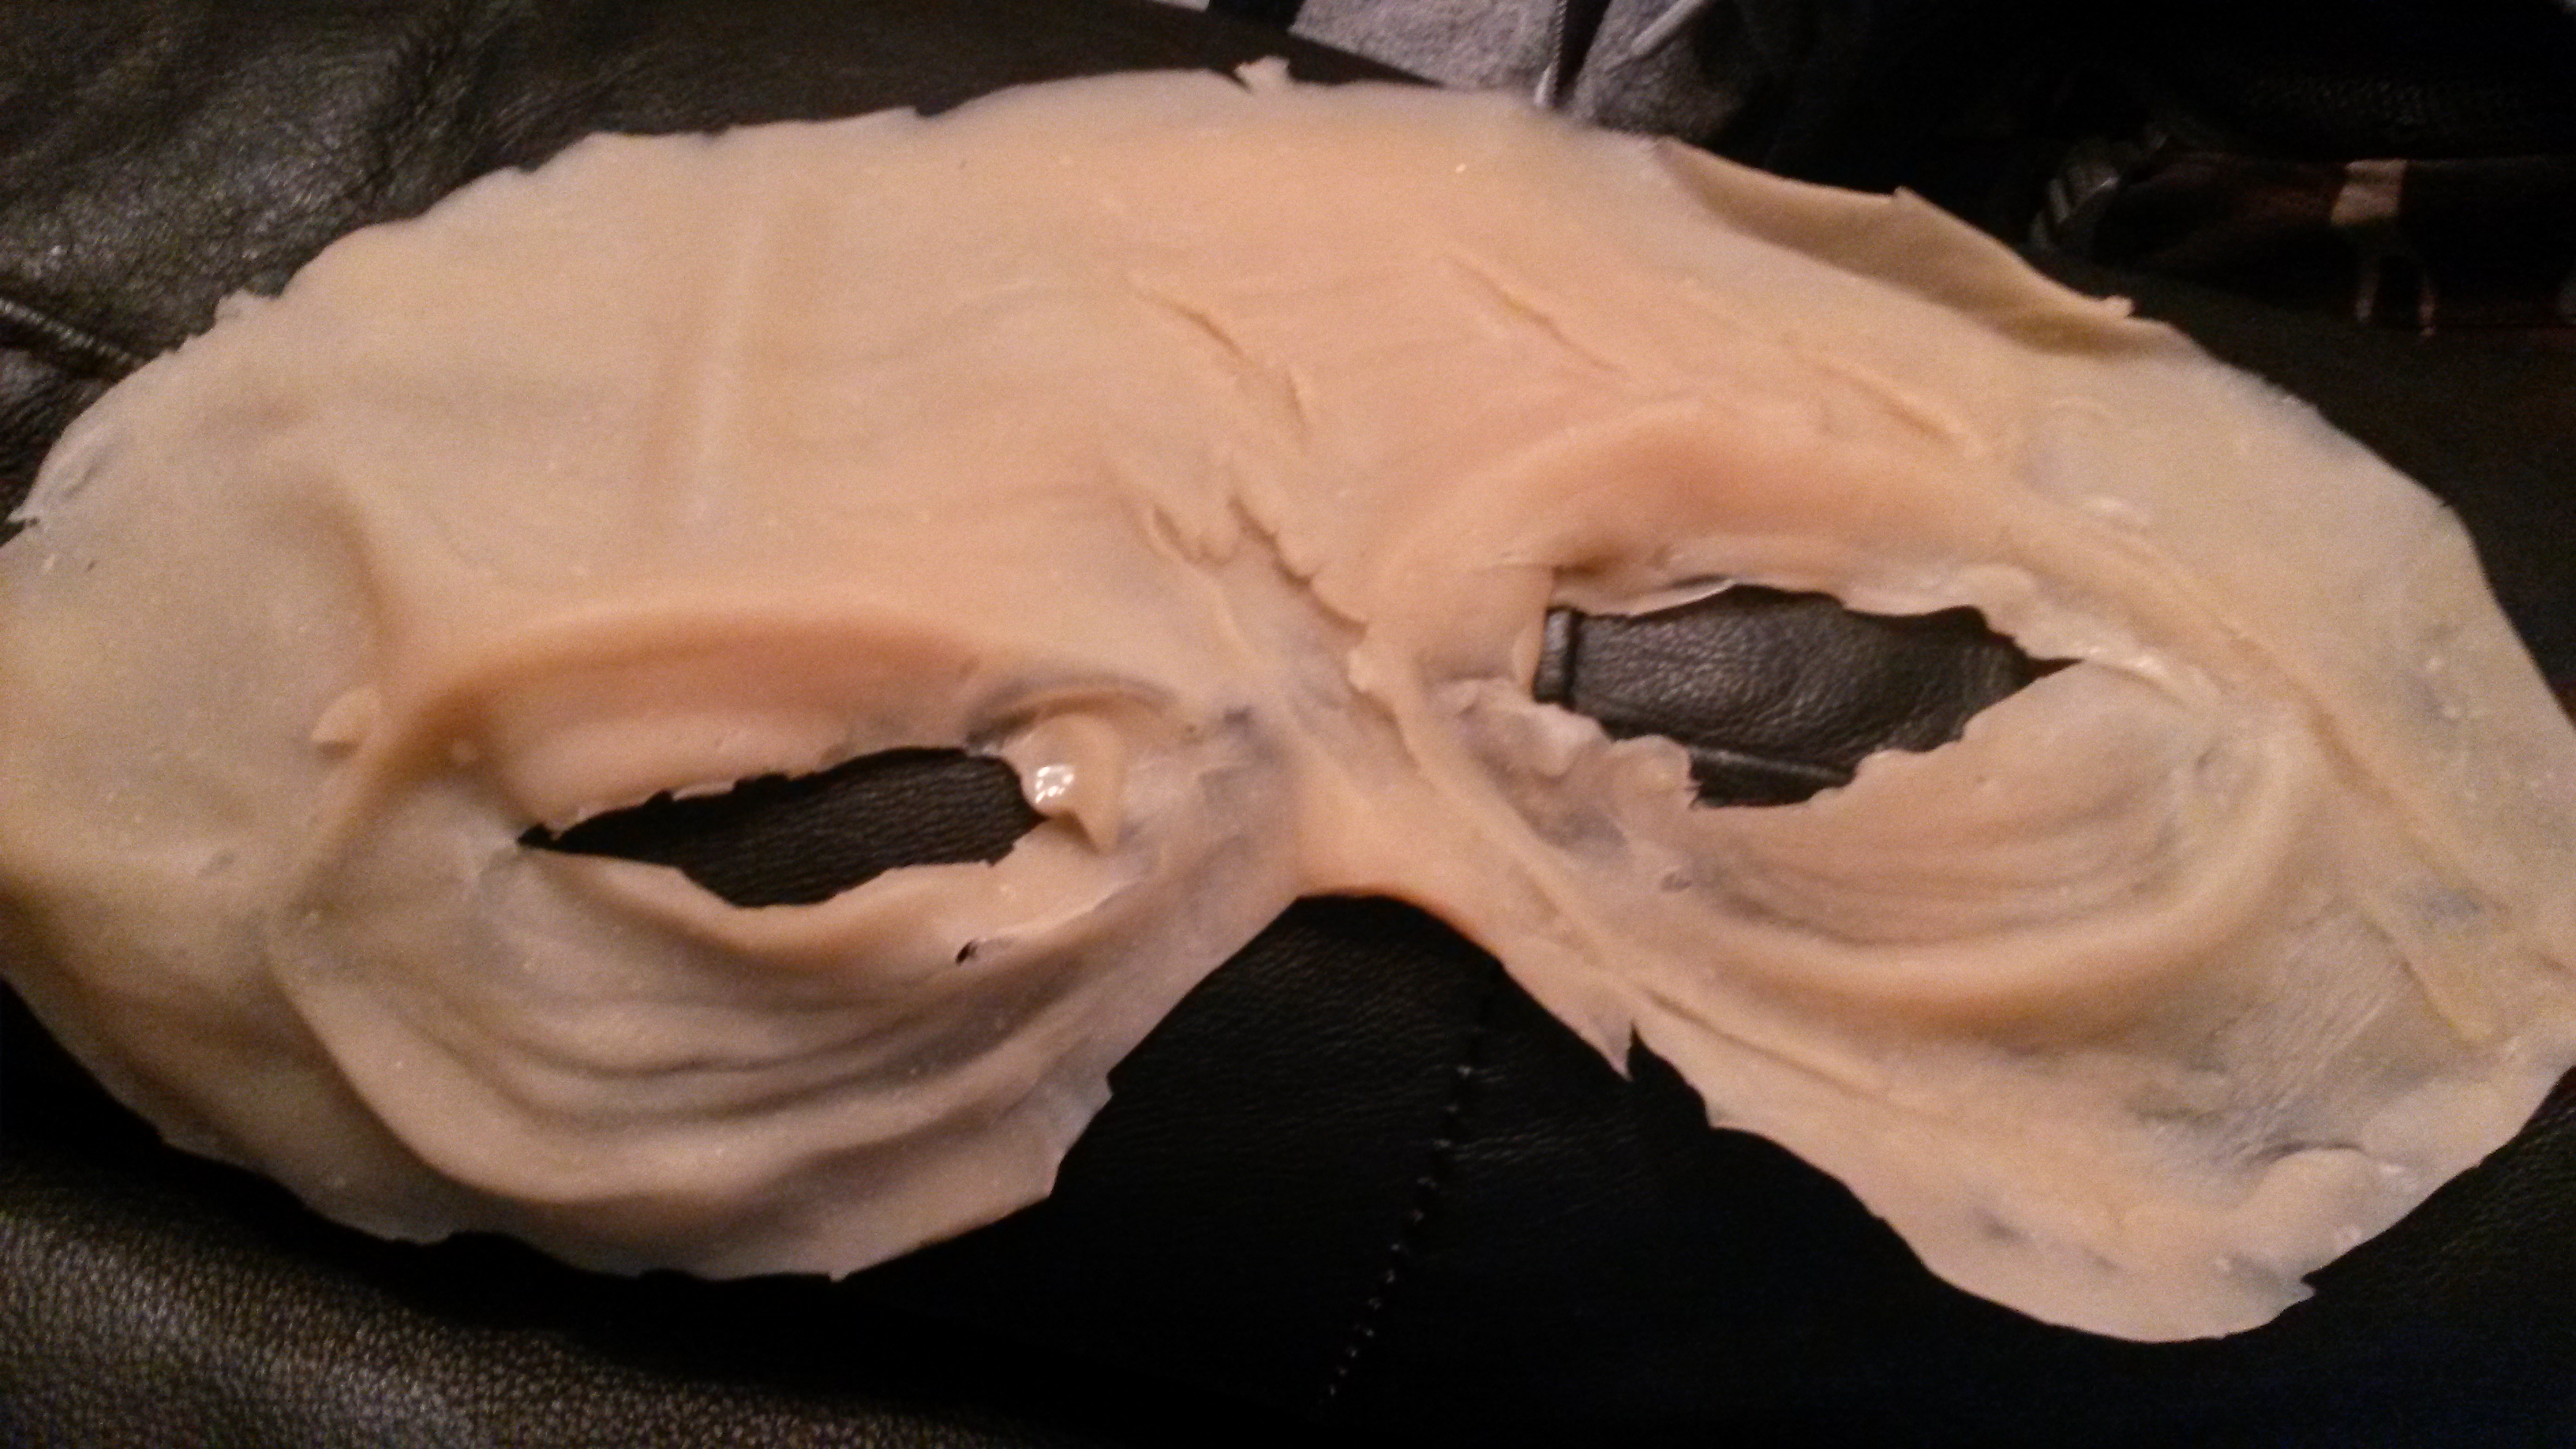
So several issues already which i will change for the next cast - when i was making the plaster mold i covered too much of the face - the entire nose was not needed so where it is now a lot of the gelatin mixture got into that cavity meaning i couldn't get a thin edge along the nose. additionally the eyes were a massive pain but that's easily solved just but cutting the gelatin but will try to work on something to just deal with this as it will not be included in facial masks.
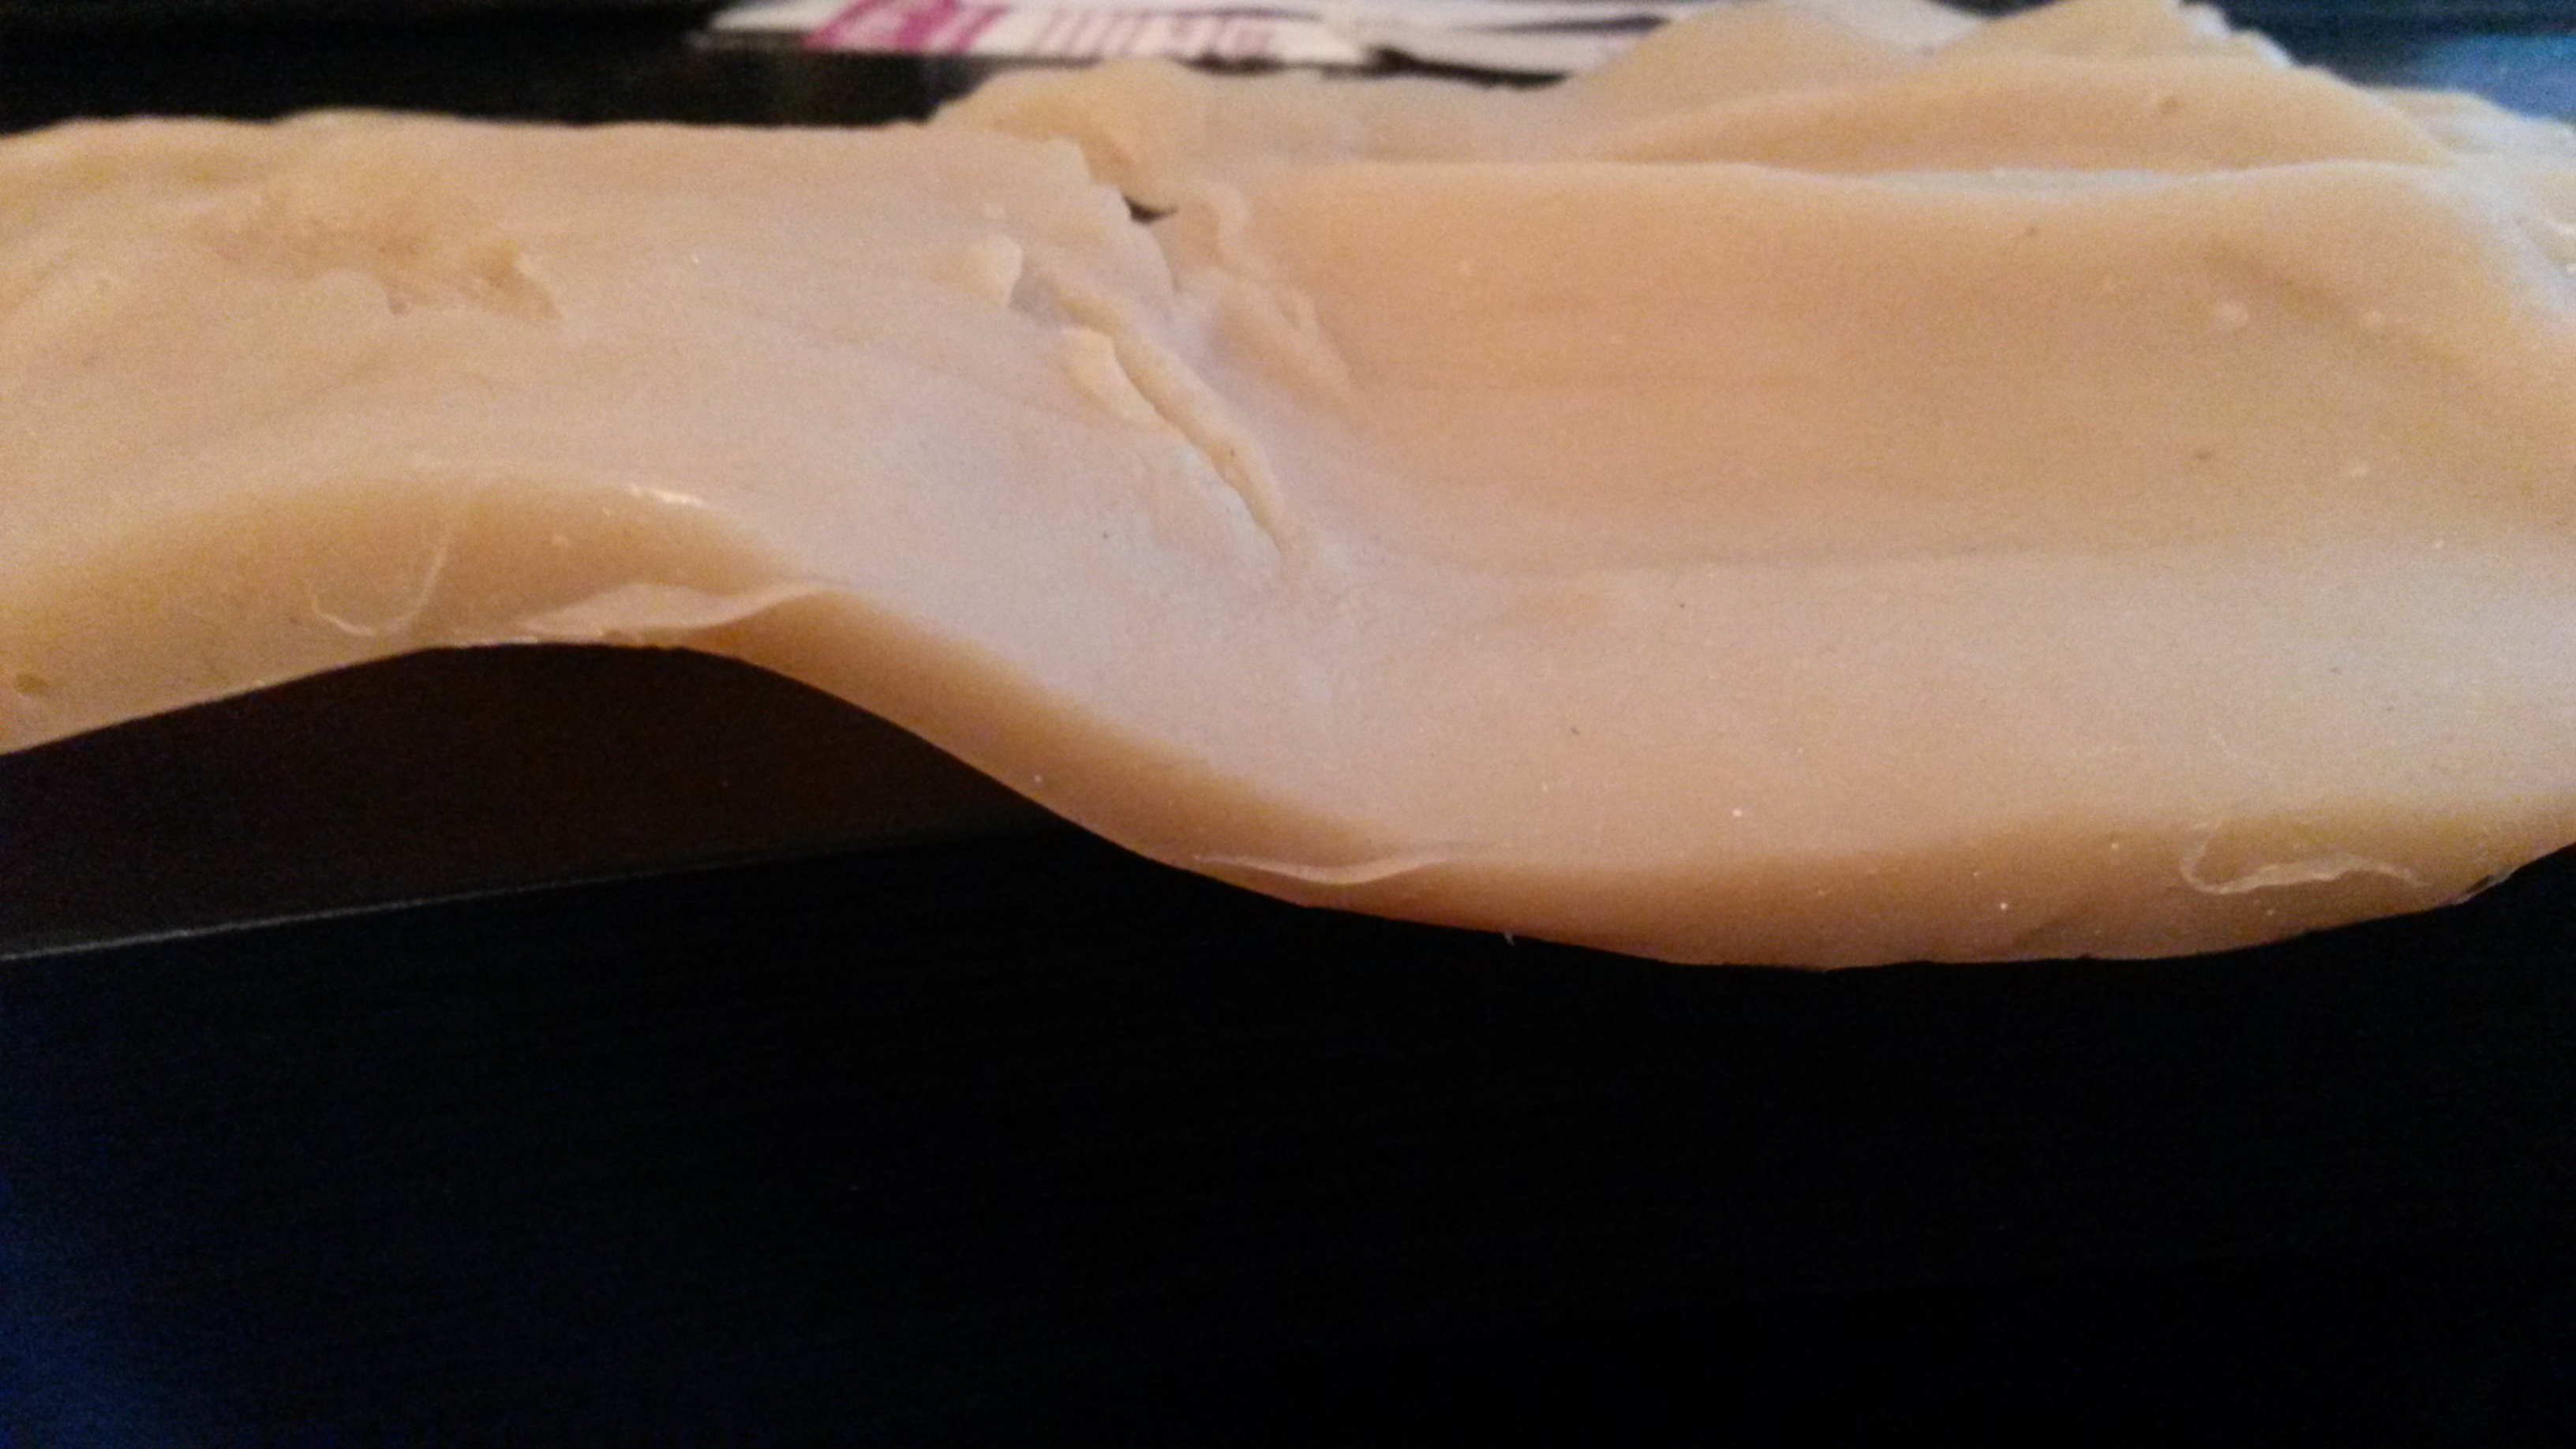
So as you can see here this is a problem with the first cast - not knowing how gelatin sets I wasn't sure how much to pour as you can see the edges are way to thick. The idea being that I would feather and tapper all the edges off so they can be blended / melted into the skin / skin tone seamlessly.
I melted some more and re-did the cast again attempting to get a thinner effect.
As you can see here its a lot thinner but i went to the other extreme of too thin - it was so difficult to hand and move without tearing. ideals i need a thin edge and a slightly denser middle along the brow where most of the features are held.
running low on time i decided to stick with the thicker one for now so i remelted the thin cast - the brilliant thing about gelatin is that if you mess up you can just re-melt it down and start again.
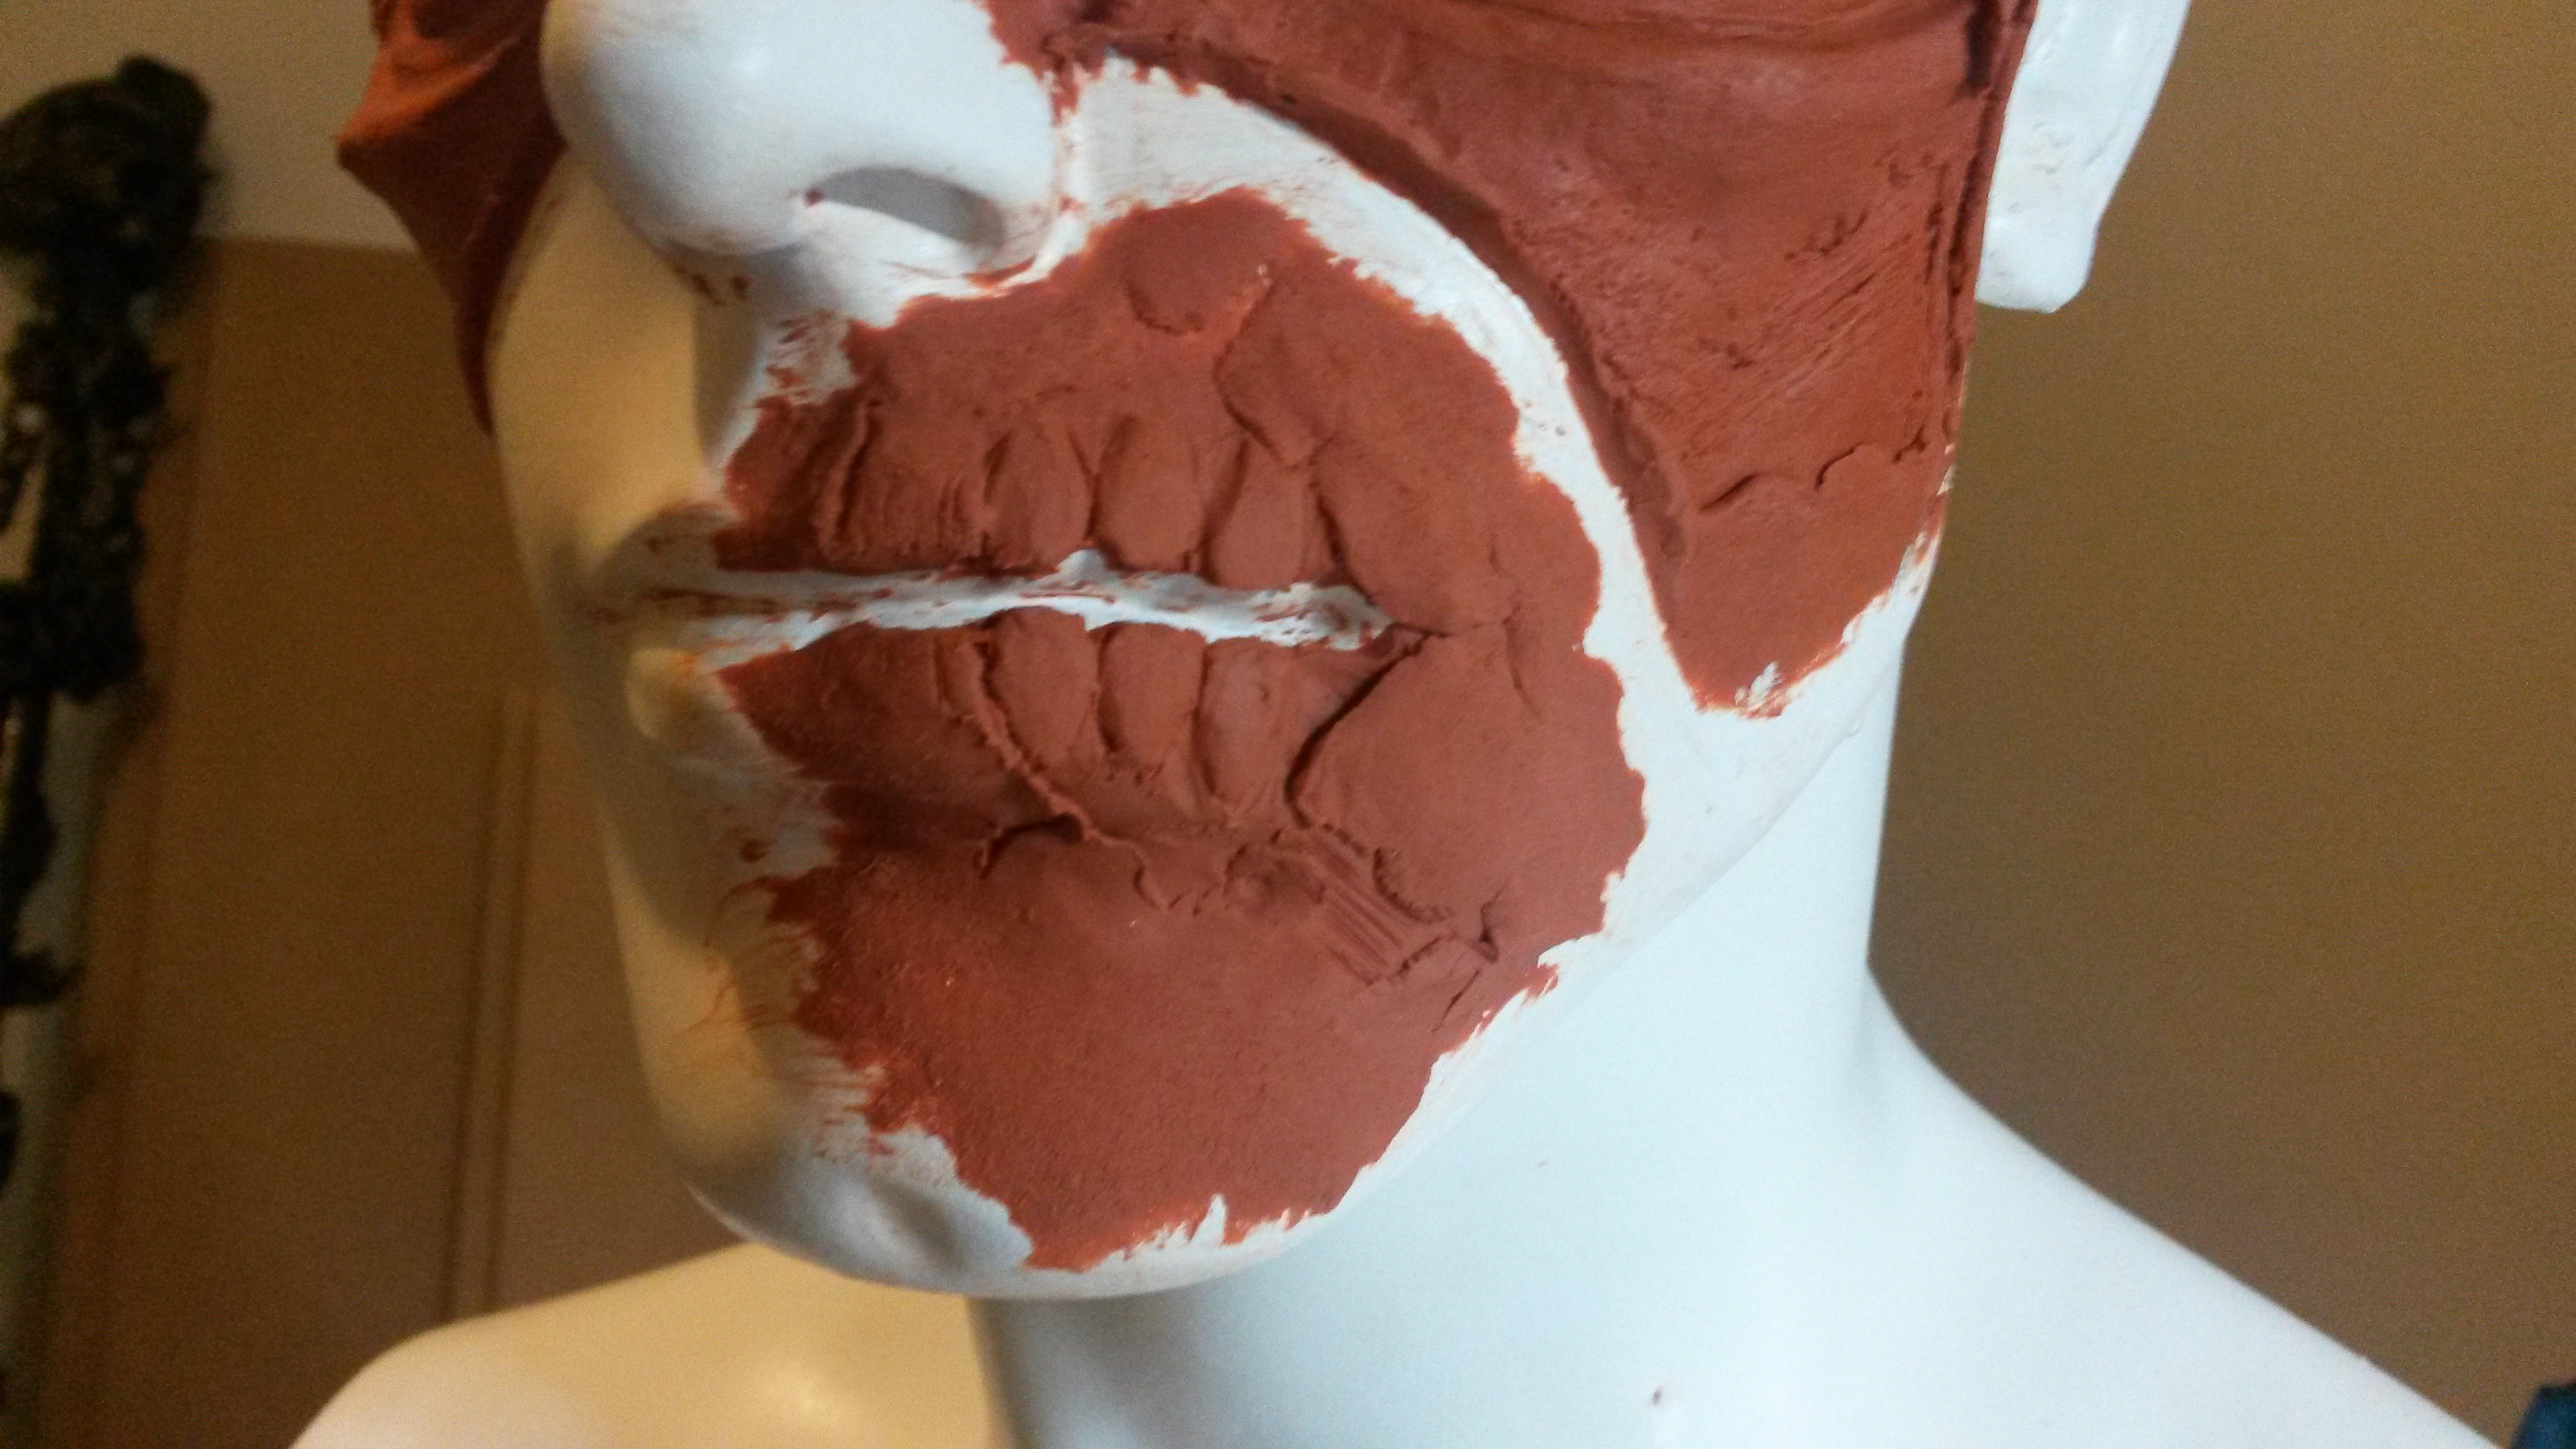
So after plaster casting the face I moved onto making a very quick lower jaw just for some more horror - as you can see here the idea being the mouth torn with teeth visible. - this was quickly molded and i proceeded to cast it in the same fashion as before. So here you can see the final cast - yes its on my leg because lighting was being an issue.
As you can see where I mentioned before about plaster issues you can see the little air holes or missed areas especially on the jaw piece. ultimately i might look into a different molding material instead of plaster - be it resin or some sort of algenate material I'll just have to experiment.
So all in all I applied the piece to my face - its a weird experience having your eyebrows stuck down. there was difficultly due to the thickness in sticking it to my face especially around the eyes stuck my eyelid at one point - I should point out this glue is strong equivalent to a medical glue.
I proceeded to painting, adding blood effects and greasing my hair up for the finished effect. I didn't have time to add the jaw piece in the end however. So you can see the edges of the mask and round the eyes but next time they'll be invisible almost and blended in when I make version 2!
Next project is for the Christmas party hopefully: Grinch Prosthetic and possibly one for Krampus - this might be a mask instead.
To summarize:
- Investigate better mold materials / techniques to avoid air pockets
- Make better molds so the casts are nice and thin at the edges
- FX Glue is a pain to get off
- Possibly pre paint parts if using for self as 99% alcohol is terrible to inhale
Thursday, 23 October 2014
Learning prosthetics
So been very busy lately but I've started a new project learning to make prosthetic's. As halloween is fast approaching I thought this would be awesome to go to parties / work with if it can master it.
So to start with I've been watching a lot of guides from Stuart Bray - including signing up for his E-lessons. I ordered / brought the starting materials to start the first step modeling the mask:
- Plasteline Clay
- Clay Tools
- Lighter Fluid
- Vasaline
- Hard Plastic Brush / Sponges
- Plastic / Clingfilm
So the design I settled for was a traditional walking dead style Zombie because I'm being cliche and I get enough werewolf-ness from LARP so I wanted a different monster.
I penciled in a shape on my mannequin body - it would of been easier to make a plaster cast of the front part of the face but I'm low on time to get this done.
Using the plasteline I blocked out the basic mask shape and started to bulk out features such as bones and eye sockets which you can see here:
So next up I wanted to add some wounds to my zombie face (so if anyone asks I was in a fight with a werewolf) so I could gore it up a little.
I started removing areas of clay to create an indentation for the deep wounds. This was followed up by texturing the bone and muscles i wanted on display.
Once I was happy i tore pieces of clay up and blending it on top of the marks to create the torn skin.
This was followed by a lot of blending and smoothing.
While I was wrapping up I used the Vaseline to make the edges thinner so it would blend in better once I ran the mold.
So as you can see its not very neat so I spent the evening textured the skin to make it a bit more life like (or unlife like) using various materials including sponges and brushes on top of plastic to change indentations and pore textures. Once I was happy I finally cleaned up the edges with the lighter fluid ready for casting.
So this is the stage its at right now, figured I'd type this up while I was waiting for the lighter fluid to evaporate before finally details and starting the plaster mold.
Once I've made the cast of this part I will start modelling the jaw and teeth.
Wednesday, 1 October 2014
Update
So it's been a very busy week for me between working at EGX, going to the NFL game and boxing I haven't had much time to rest.
So hopefully during this week / weekend I'll have time to work on more stuff.
So hopefully during this week / weekend I'll have time to work on more stuff.
Wednesday, 24 September 2014
War Table - Ice
So currently working on building a table top table ever other day after work. Primarily designed for Warhammer - Fantasy & 40K, but can also be used for D&D and anything else we will play on it.
Design wise I'm not following any plans this is all just coming off the top of my head, so it's all up in the air about what might be on there at the end.
Seeing as typically you normally only see green, valley like tables or industrial ruins I wanted to go with something different so I thought an ice board would be an interesting idea.
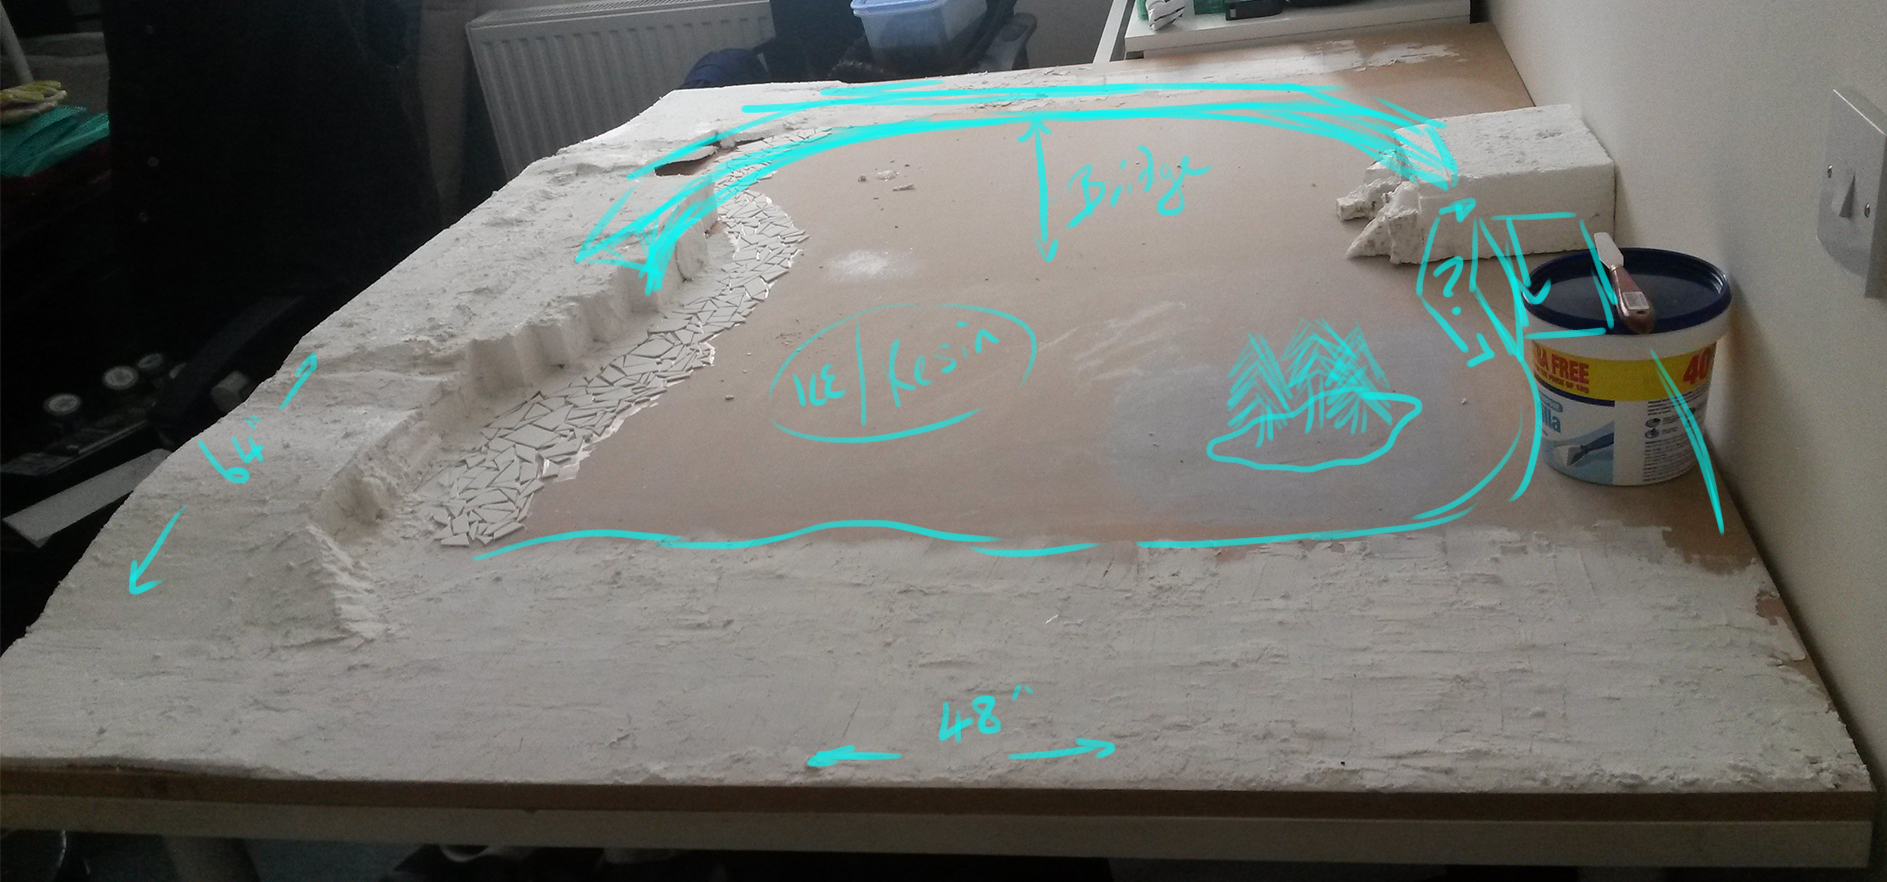
So here you can see the progress so far:
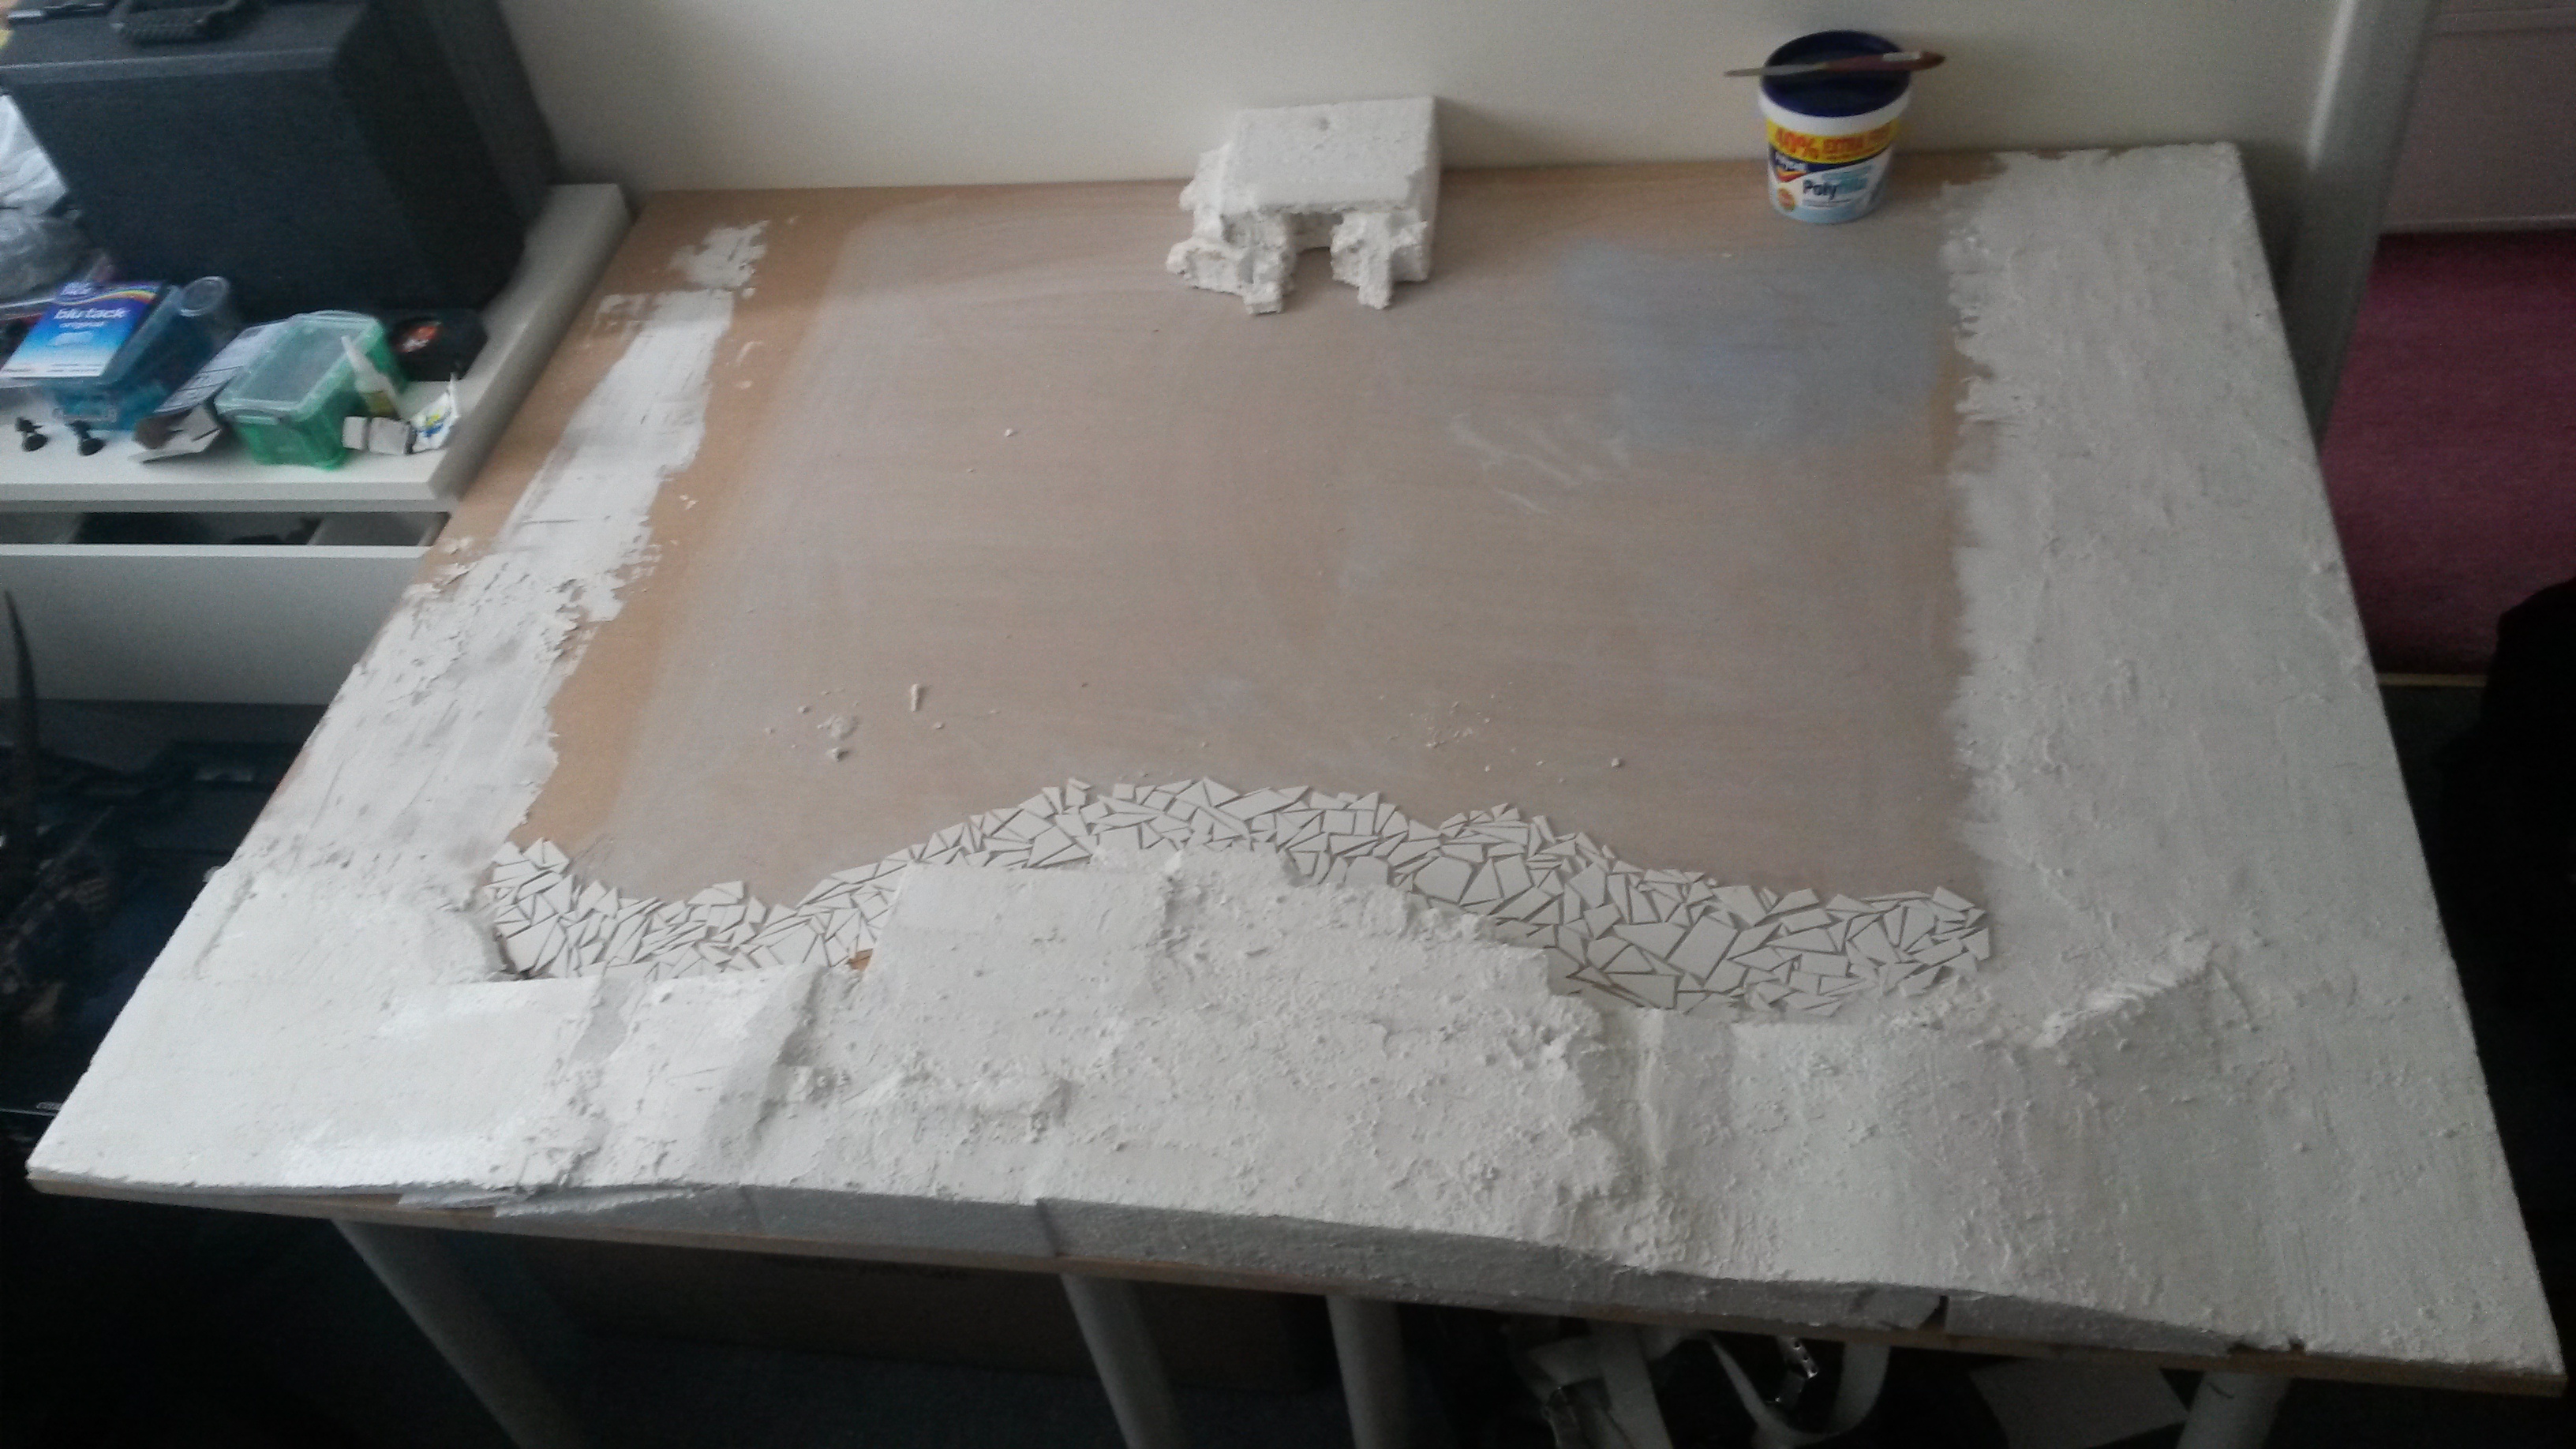
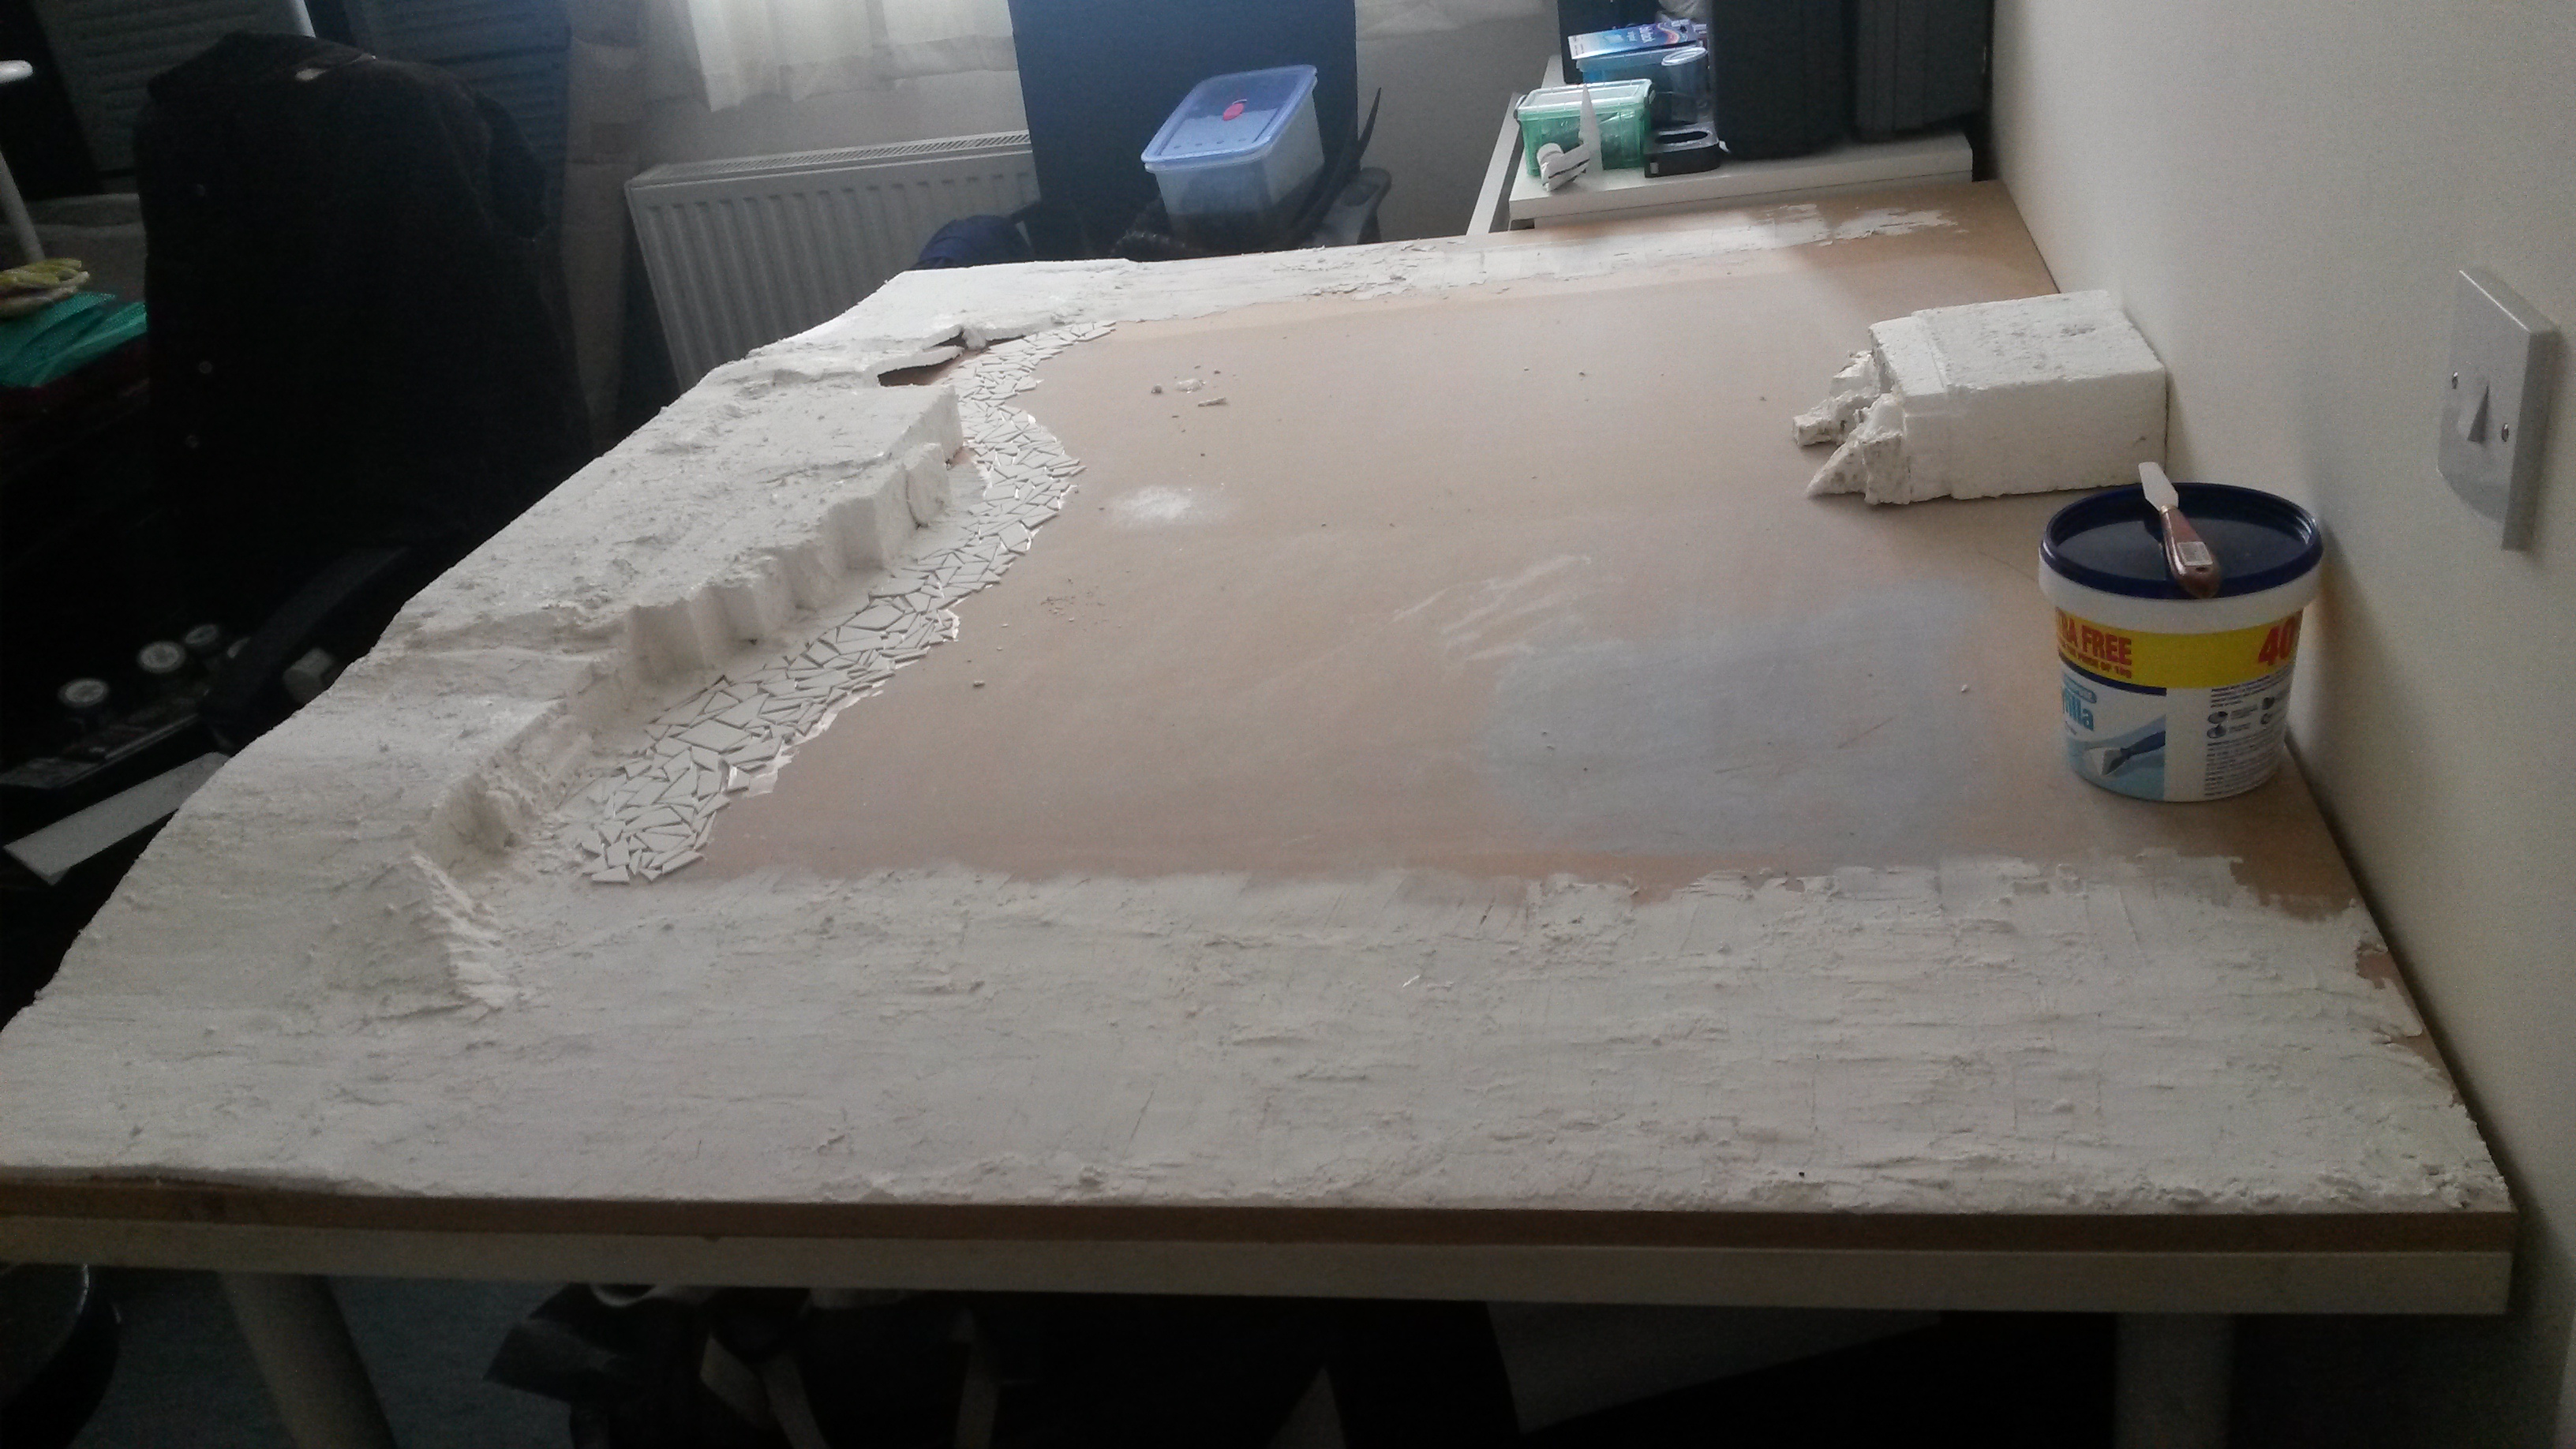 So its primary made from a foam / polystyrene base glued on top of a large wood board. Currently I'm in the process of using filler to cover / strengthen all the polystyrene and wood where I want the snow effect to be. Bit of a long process at the moment as I have to wait for it to dry a lot as its hard to tell with white on white which parts id previously done.
As you can see I'v started also marking out the broken ice around the edge. The middle will be an ice lake which will be painted and coated with clear effect resin.
The plan also is to have an ice bridge that is dis-connectable going across one side to the other just to add another level to the game.
Here's a quick doodle of whats planned at the moment:
So as you can see the bridge will go across joining both larger rock formations. in contemplating the idea of a ramp on the right side also so its possible to cross over both but that's still to be decided. After all of the main stuff has been finished I still have to make terrain pieces to use as cover for war games, so this will be primary trees, large ice formations etc.
Its a bit of a shame that Warhammer doesn't like gridded terrain as that way I could easily use this board for D&D sessions also.
So for the next few days / weeks when I get a chance to work on it, it will mostly be filling in and then sanding the filler down before painting base colours.
This is the first of several, there are still 3 other large boards and 2 half boards we brought to also be designed on with various terrains, however I'll be saving 1 of the larger ones to use for D&D exclusively with a wipe-able gridded sheet. Next will probably been a more modern / future city board that cna be used for 40K, Dropzone, Shadowrun etc etc
Design wise I'm not following any plans this is all just coming off the top of my head, so it's all up in the air about what might be on there at the end.
Seeing as typically you normally only see green, valley like tables or industrial ruins I wanted to go with something different so I thought an ice board would be an interesting idea.
So here you can see the progress so far:

 So its primary made from a foam / polystyrene base glued on top of a large wood board. Currently I'm in the process of using filler to cover / strengthen all the polystyrene and wood where I want the snow effect to be. Bit of a long process at the moment as I have to wait for it to dry a lot as its hard to tell with white on white which parts id previously done.
As you can see I'v started also marking out the broken ice around the edge. The middle will be an ice lake which will be painted and coated with clear effect resin.
The plan also is to have an ice bridge that is dis-connectable going across one side to the other just to add another level to the game.
Here's a quick doodle of whats planned at the moment:
So as you can see the bridge will go across joining both larger rock formations. in contemplating the idea of a ramp on the right side also so its possible to cross over both but that's still to be decided. After all of the main stuff has been finished I still have to make terrain pieces to use as cover for war games, so this will be primary trees, large ice formations etc.
Its a bit of a shame that Warhammer doesn't like gridded terrain as that way I could easily use this board for D&D sessions also.
So for the next few days / weeks when I get a chance to work on it, it will mostly be filling in and then sanding the filler down before painting base colours.
This is the first of several, there are still 3 other large boards and 2 half boards we brought to also be designed on with various terrains, however I'll be saving 1 of the larger ones to use for D&D exclusively with a wipe-able gridded sheet. Next will probably been a more modern / future city board that cna be used for 40K, Dropzone, Shadowrun etc etc
Monday, 22 September 2014
Planetscape #3
So currently working on building a table top table ever other day after work. Primarily designed for Warhammer - Fantasy & 40K, but can also be used for D&D and anything else we will play on it.
Design wise I'm not following any plans this is all just coming off the top of my head, so it's all up in the air about what might be on there at the end.
Seeing as typically you normally only see green, valley like tables or industrial ruins I wanted to go with something different so I thought an ice board would be an interesting idea.
So here you can see the progress so far:

 So its primary made from a foam / polystyrene base glued on top of a large wood board. Currently I'm in the process of using filler to cover / strengthen all the polystyrene and wood where I want the snow effect to be. Bit of a long process at the moment as I have to wait for it to dry a lot as its hard to tell with white on white which parts id previously done.
As you can see I'v started also marking out the broken ice around the edge. The middle will be an ice lake which will be painted and coated with clear effect resin.
The plan also is to have an ice bridge that is dis-connectable going across one side to the other just to add another level to the game.
Here's a quick doodle of whats planned at the moment:
So as you can see the bridge will go across joining both larger rock formations. in contemplating the idea of a ramp on the right side also so its possible to cross over both but that's still to be decided. After all of the main stuff has been finished I still have to make terrain pieces to use as cover for war games, so this will be primary trees, large ice formations etc.
Its a bit of a shame that Warhammer doesn't like gridded terrain as that way I could easily use this board for D&D sessions also.
So for the next few days / weeks when I get a chance to work on it, it will mostly be filling in and then sanding the filler down before painting base colours.
This is the first of several, there are still 3 other large boards and 2 half boards we brought to also be designed on with various terrains, however I'll be saving 1 of the larger ones to use for D&D exclusively with a wipe-able gridded sheet. Next will probably been a more modern / future city board that cna be used for 40K, Dropzone, Shadowrun etc etc
Design wise I'm not following any plans this is all just coming off the top of my head, so it's all up in the air about what might be on there at the end.
Seeing as typically you normally only see green, valley like tables or industrial ruins I wanted to go with something different so I thought an ice board would be an interesting idea.
So here you can see the progress so far:

 So its primary made from a foam / polystyrene base glued on top of a large wood board. Currently I'm in the process of using filler to cover / strengthen all the polystyrene and wood where I want the snow effect to be. Bit of a long process at the moment as I have to wait for it to dry a lot as its hard to tell with white on white which parts id previously done.
As you can see I'v started also marking out the broken ice around the edge. The middle will be an ice lake which will be painted and coated with clear effect resin.
The plan also is to have an ice bridge that is dis-connectable going across one side to the other just to add another level to the game.
Here's a quick doodle of whats planned at the moment:
So as you can see the bridge will go across joining both larger rock formations. in contemplating the idea of a ramp on the right side also so its possible to cross over both but that's still to be decided. After all of the main stuff has been finished I still have to make terrain pieces to use as cover for war games, so this will be primary trees, large ice formations etc.
Its a bit of a shame that Warhammer doesn't like gridded terrain as that way I could easily use this board for D&D sessions also.
So for the next few days / weeks when I get a chance to work on it, it will mostly be filling in and then sanding the filler down before painting base colours.
This is the first of several, there are still 3 other large boards and 2 half boards we brought to also be designed on with various terrains, however I'll be saving 1 of the larger ones to use for D&D exclusively with a wipe-able gridded sheet. Next will probably been a more modern / future city board that cna be used for 40K, Dropzone, Shadowrun etc etc
Saturday, 20 September 2014
Planetscape #2
(These posts are a little short as I did them a little while back so a lot of the stuff isn't fresh in my head right now but when i start updating things as i do there will be more notes and during screens also)
So moving onto another planet, this one required a bit more work than the other, I settled on working on a gas giant because I think they're pretty underrated and it was a great reason to learn how to create planet rings.
To start with I tried out a new way to create the star field this time just to compare how they look - while the tech planets was made from a brush this one was by using a Gaussian noise filter.
This one looks a lot neater and makes the stars look very far away compared to the other. So I might have to play around with both next time.
The rings were an interesting thing to learn, I discovered that there are 2 ways to make them - by a spiral filter or a slightly longer glow filter. I settled with the latter just because it had a bit more detail to it.
After that it was just a matter of playing around with light and gas clouds.
Overall I took at lot of techniques I learned from the first planet over into this one the only really new feature was the rings which weren't as bad as i thought they would be. The only thing right now I will need to go back and change will be making the moon's textures a bit more HD.
To summarize:
- Created Space scene #2 in Photoshop
- Picked up some a very useful lesson in ring creation for planets
- Carried over the clouds / gas creation from the previous image as it worked well with a gas planet theme
- Next up try something new again for the next planet
Friday, 19 September 2014
Planetscape #1
So working my way through still, I posted the brief I'm working on separately so its nice a neat to keep track of.
So to start off I figured some concept style art of some nice space backdrops in Photoshop will help me get inspired - and at the same time help me brush off my Photoshop skills which admittedly haven't been touched since college so I'm a little out of touch.
To be honest I got inspired to start this all after watching the Stan Winston School video for character creation in Photoshop. I also downloaded a lot of the brushes that the main artist used as he so nicely put them up for download on his DA page.
So to start with I settled on an idea of a tech planet, and started off by playing around with a new set of brushes while planning out the basic scene I wanted.
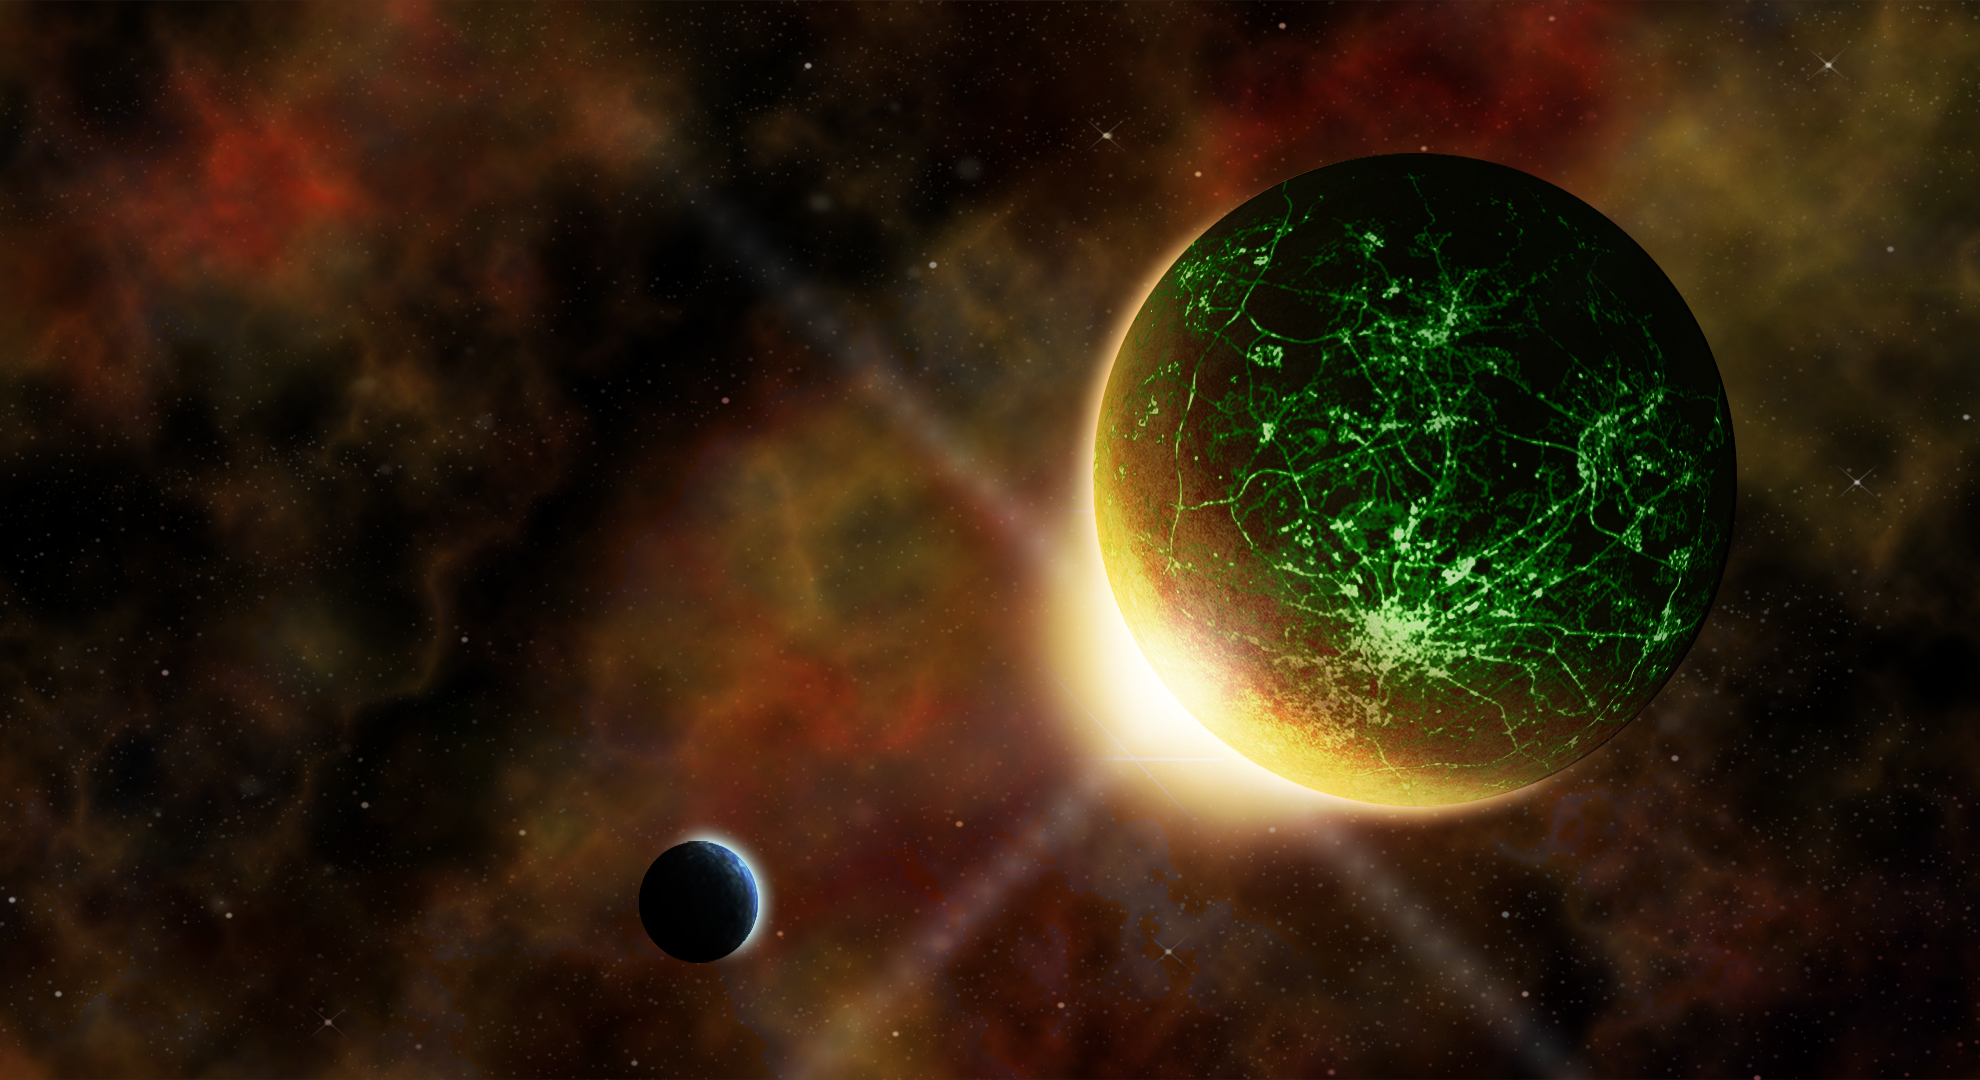
Here is the final result of what I ended up with:
The backdrop with the stars and nebular was created with the new brushes and playing around with various filters which was fun to tinker around with.
So here's where all the learning and research starts:
I brushed up on a few skills when starting the planet, coming across a nice tutorial on creating a ground like texture online. I played around with creating several textures to use in other scenes and started to adjust and colour the planet itself in. It's a technique that's was very handy to pick up for future planet designs.
As I wanted a very tech biased planet I thought being able to see the cities and lights from space would be very interesting and provide me with a second technique to learn. I had a Google around for some lights from space tutorials, a lot of them said the same thing but I wasn't happy with part of the tutorial regarding colour and lighting so I played around with it until I got something that I was happy with. It does look a bit low res but I'm happy with what Iv got for now. I know green is a typical colour for tech sci-fi but I wanted to use something with that level of green.
I finished it off with the sunflare and moon and left it at that. Overall very happy with how this turned out and alot of lessons to take over to the other planetscapes.
To summarize:
- Created Space scene #1 in Photoshop
- Picked up some handy lessons in planet textures and shading in layers
- Picked up a helpfully lessons in city lights that may need re-doing in more definition in future
- Enjoyed creating clouds / gas so much to carry over in the next scene
In space no one can hear you.......paint
So working on a little project with a theme to get me focused. Now while there are a lot of themes I'd like to follow I've settled with Space and the main brief is to create concept art & models for the following:
Coincidentally I have been re-watching a lot of my favorite sci-fi programs so this should help a fair bit.
- Backdrops / home worlds for 4 unique races
- At least 2 types of space ships for each race - 1 Transport / Trade ship & 1 General / Attack ship
- At least 2 types of Aliens - Male / Female or other depending on what I come up with
- At least 1 Space Station / Docking facility for each race type
- Icons / Badges representing each race.
Coincidentally I have been re-watching a lot of my favorite sci-fi programs so this should help a fair bit.
Wednesday, 17 September 2014
I AM KROGAN!
So continuing once more with updating older stuff this is the latest piece of sculpting I was toying around with. Its a short post this time unfortunately.
After reading some articles in 3D Artist about 3D printers I got the idea to try to sculpt something I could print, a little character model would be perfect!
For my love of Mass Effect I thought a Krogan model would be interesting to make as they have lots of detail to them.
I started toying around with a basic sculpt for Wrex's head, as you can see the model itself has a basic shape to it but that is it so far.
So during my sculpt planning I discovered a problem. Sculpting is difficult and somewhat pointless to make a humanoid shape from scratch when there is an easier solution at hand. Ideally the best way to tackle this would be to make a generic male humanoid shape in Blender and then transfer it to Sculptris then work on the detail within this program instead of attempting to make it all from scratch.
So after an evenings work I put down the pen and decided to leave this until I had learned how to create models in Blender first.
This will be a technique used in future projects as I really want to work on something that can be 3D printed.
To summarize:
- Learn and create basic models in Blender to transfer into Sculptris
- Import a humonoid model and sculpt ontop of it
- Create a cool scaled model to 3D Print in the future
Tuesday, 16 September 2014
Sculptris....with more skulls
So moving on through updating my older projects on here.
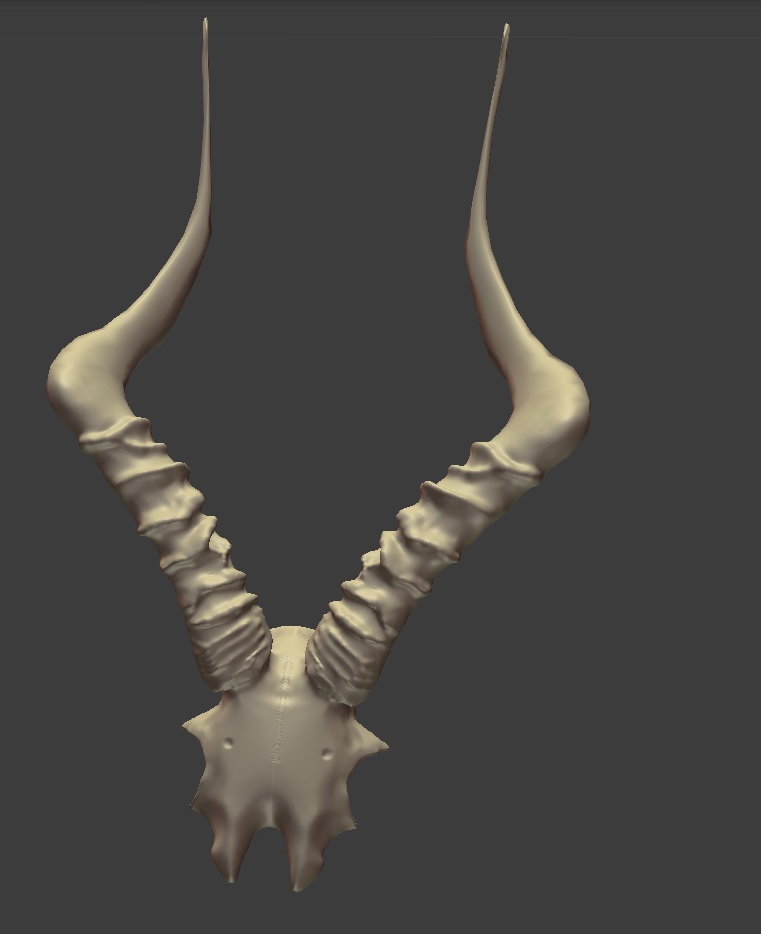
My a few months back other half went on a family/hunting trip back to his home in South Africa, he and his dad brought me back some horns from a Springbok and a Rooibok. Looking at the Rooibok skull I decided it would be a good idea to try sculpting it as I have a model in front of me to rotate and see all the aspects of.
To start with I started playing around with the interesting materials Sculptris provides and settled on this bone colouring instead of the red i had previously used. Unlike with eh wolf skull I could see more on this sculpt using the white rather than the red. I guess it pretty much comes down to what shape your sculpting is that gives the best highlights to help.
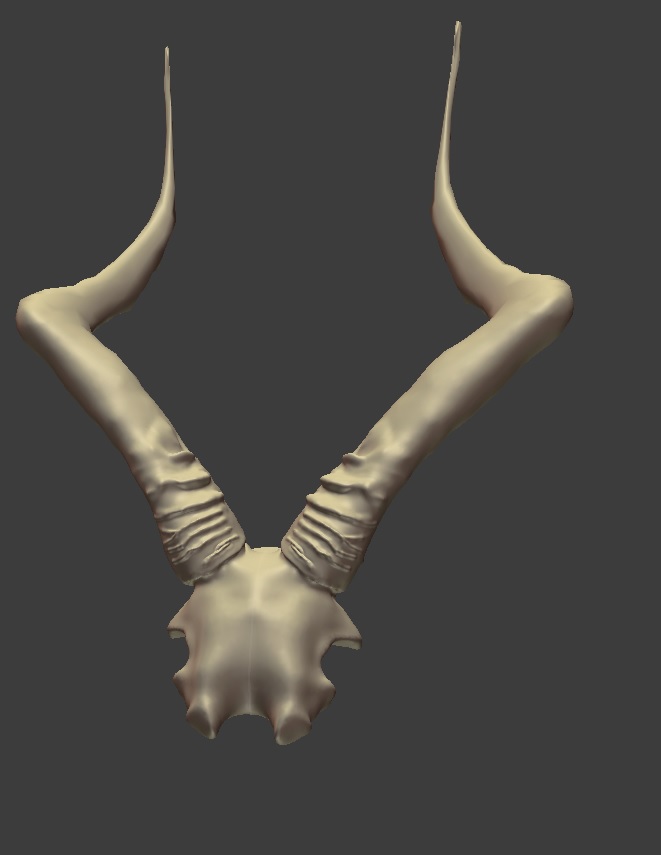
So one of the biggest problems I started with was getting the horns to extend without having the flat tearing issue I've experienced before, so it was a slow process extending the blob then inflating it so it would keep a shape, got their in the end with a rough shape, you can see right at the tip of the horns its starting to get that slight error to it which i need to fix. I manged to get the basic shape down pretty quickly this time.
The only thing to be aware of the skull I'm working from isn't uniform - half of the faceplate is cut off on the left side - but because of how the sculpting program works it works symmetrically along that central line so its not something I can fix until the very end of the sculpt as once you turn the symmetry off you wither cant turn it back on or it just can ruin stuff - I cant recall which happens off the top of my head right this minute.
Next step was to roughly mark out by inflating where the ridges on the horns started to go and then bulk them out later on.
So after another few evenings it now looks something like this:
You can see much clearly with the horns about the systemtry feature.
So I fiddled around with the angles and fixed the overall shape of the skull itself, attempting to make it flatter as you can see I went a bit too far with the flattening tool but I'll fix that later on at some point. I continued along with the horn ridges and inverting the inflate tool to help create the slip where the skull and horns attach separately. Inverting the controls is an amazing feature to play around with it really helps creating the definition you need.
Thankfully the horn ridges tapper off just after curving round, I was dreading the idea of working on the thinnest section just in case I tore through the shape.
I think overall so far with this model I haven't encountered that many problems or issues just yet, I think the next challenge will be working on the underside of the skull - making it into a shell basically - as this has to be shaped in such a way I'm worried it might in inadvertently affect the stuff I've done to the top side but we'll see when I come back to it. I got weighed down with some other stuff so I put it to one side at the moment but like the wolf skull its something I'll be coming back to to finish off as I don't want to leave these unfinished.
Overall defiantly feeling comfortable with the program itself, I just need to sit down and learn to refine the models and details some more.
To summarize:
- Continue to play around in the Sculptris program
- Create and work on a basic model with access to physical reference material
- Learn techniques to take onto the next model - mostly inverting
- Go back and learn tutorials / lessons to improved and develop on model for a future date
Monday, 15 September 2014
Introduction to Sculptris
So as I’ve mentioned somewhere before I’ll start by
uploading a fair bit of my progress from ongoing projects – so it’ll be a lot of
older stuff that people may have seen before on Facebook etc. The downside
being is a lot of details / lessons or stuff I picked up while I was doing it
might not be listed here as it was some time ago I started it, but for the
newer projects it will have lot more detail put into it.
But where better to star than me learning a new piece of software. I should state
that I only spend the few hours I can after work to learn and develop upon whatever
I might be working on at the time.
So, on my quest to learn 3D modelling I ran into a few
problems, as most adventurers do when starting off a new quest! However for me
they were mostly cost based issues. I couldn’t afford the software used or art
time courses in London to learn them from (I have now since managed to find a
course in Richmond that is actually affordable but it will now have to wait
till next year before I can look at signing up for the course) however not all
hope was lost! As such to start with I’m going to use the free software for modelling
– Sculptris and Blender.
As I’ve sculpted (with clay) before in my art course I
decided to start with Sculptris to look at first (my plan now however is to
learn blender so I can import models over to Sculptris to detail but that will
be mentioned in future course after Iv updated all my older stuff first) so to
start with I brought up youtube tutorials and watched them, but I tried to jump
right in and attempt to make something.
I know all beginning tutorials are normally something simple
like make a shape / cube / teapot or what not, but being how I am I learn a lot
more diving right in so I decided to take the lessons I watched on Youtube /
read on various sites and apply it to a model I’d be happy to work with. And
considering this was just me seeing if it was something I’d like to do more of
making a sphere or something isn’t going to exactly win me over so just to
start with I decided to make something Id enjoy just to start with then go back
and work on all the lessons properly.
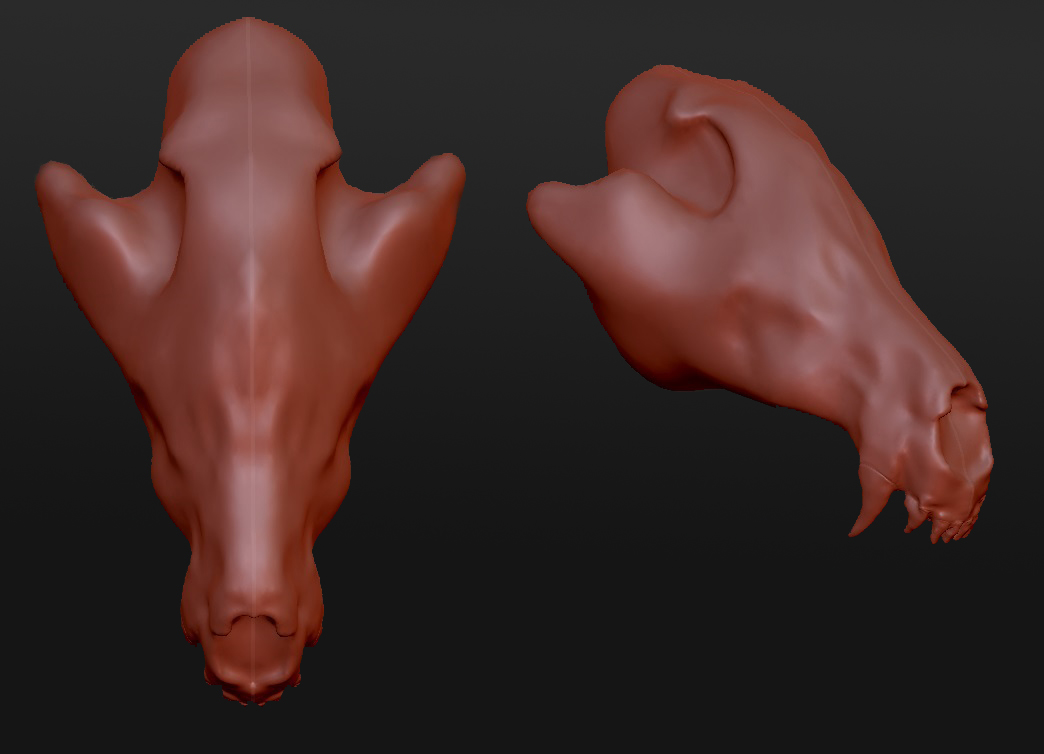
As I love wolves I started
off with a wolf skull (so I wouldn’t have to worry about fur detailing but just
get to grips with the program) I managed to find several reference pictures online
from different angles that would help. The image below is after an evening or 2
after work just playing around and getting basic shape going.
I was quite pleased with what I had so far, I’d also been
using a tablet to work with which for me felt a lot nicer to use. I learned quite
quickly also to make running saves as I had a lot of issues with extending
parts of the shape too flat would cause a lot of clipping issues that I just couldn’t
fix. I also discovered that to remove sections is difficult – so to make the
jaw bone shape bend round was not how I pictured it being, with clay you can
just cut away at that part and remove the centre but with the program you wither
have to extend the shape to go around or you start pushing the material to the
side to create a hole. Overall it was rather challenging just to get the shape I
was after but when I finally managed it I felt happy with what I had.
I was determined to play around with the other tools and
start giving the model more shape / definition so as seen below if my progress
after another evening or 2 after work. A
lot of my focus was on getting the lower jaw built and the teeth to line up and look the right shape.
As you can see it started to come together more, the main
problem I now discovered was working on the back part of the skull where the skull and lower jaw bone join, reference pictures
are amazingly helpful but none of them show the area underneath or clearly
enough so I had no idea how to naturally model that part of the skull leaving
me at a sort of standstill at that point.
For now I’ve left it at that point, but it is something I
will come back to again to finish but I wanted to play around with another
model as I had a skull at home to use as a reference point rather than pictures.
But as this was just me learning the software I felt this was a good start.
I’ve got lots of issues of 3D Artist magazines given to me
recently so at some point I need to flick through and look through the issues
with reference to sculptris / Zbrush and look at the CD material
To summarize:
- Learn a new program - Sculptris
- Create and work on a basic model – Wolf Skull
- Learn techniques to take onto the next model
- Go back and learn tutorials / lessons to improved and develop on model for a future date
Saturday, 13 September 2014
Blog almost set up.
First blog on the site!
So its almost up and running, should hopefully have it sorted by the end of the weekend, been tinkering around with code to try and get a cool looking content slider on the front page (big thanks to my other half for trying to sort that piece of code out).
So this blog is somewhere to dump all my ramblings and current project status' with lots of pictures hopefully! Will mostly be ranging from Photoshop, 3D Modeling and LARP crafts.
Will attempt to update this regularly as possible but that just comes down to how much I get done at one point. For now I'll be back logging through projects and uploading what things are looking like at present.
Keep an eye on this place so to speak!
Subscribe to:
Comments (Atom)


